Vinyl Siding to Stucco Transition A Seamless Blend
Vinyl siding to stucco transition—it sounds simple, right? However, achieving a truly seamless and visually appealing blend between these two popular exterior materials requires careful planning and execution. This guide dives into the aesthetics, installation techniques, structural considerations, costs, and building codes involved in creating a stunning and durable transition. We’ll explore various design options, from subtle to bold, and guide you through each step of the process, helping you avoid common pitfalls and achieve a professional-looking finish.
We’ll cover everything from choosing the right trim and flashing to addressing uneven surfaces and ensuring watertight seals. Whether you’re a seasoned DIYer or a homeowner tackling your first exterior renovation project, this comprehensive guide provides the knowledge and confidence to successfully navigate the vinyl siding to stucco transition.
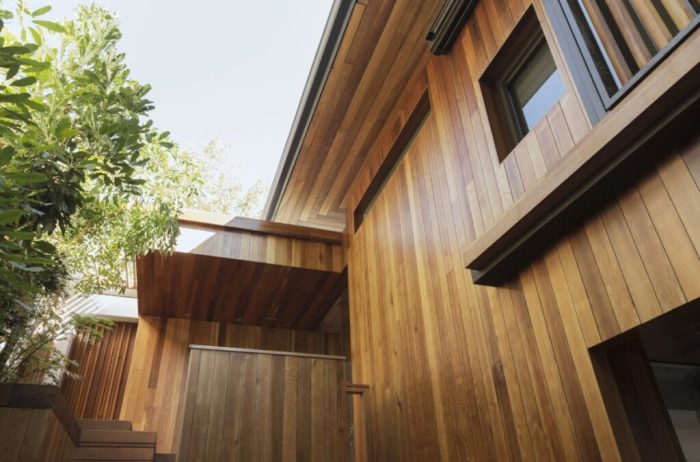
Aesthetic Considerations of Vinyl Siding to Stucco Transitions

Source: cdpstucco.com
Creating a visually appealing transition between vinyl siding and stucco requires careful planning and attention to detail. A poorly executed transition can detract from the overall curb appeal of your home, while a well-designed one can seamlessly blend the two materials and enhance the architectural style. This section explores various design options and color palettes to help you achieve a harmonious and aesthetically pleasing result.
Design Options for Visually Appealing Transitions
Several design approaches can successfully integrate vinyl siding and stucco. The choice depends on the architectural style of the house and personal preference. Key elements include the use of trim, the selection of colors and textures, and the overall consistency of the design. A well-defined transition line is crucial to avoid a jarring contrast.
Color Palettes and Textures that Complement Both Materials
Color coordination is essential for a cohesive look. Consider using analogous colors—colors that are next to each other on the color wheel—for a harmonious feel. For example, a light beige stucco could transition beautifully to a creamy white vinyl siding. Alternatively, complementary colors—colors opposite each other on the color wheel—can create a striking contrast, provided it’s balanced. A deep blue stucco could pair well with a light gray vinyl siding. Textures should also be considered; a smooth stucco might complement a textured vinyl siding with subtle variations, or vice-versa. Avoid stark contrasts in texture, as this can highlight the transition point in an unflattering way.
Examples of Successful and Unsuccessful Transitions
Imagine a home where a light gray stucco smoothly transitions to a slightly darker gray vinyl siding using a wide, painted corner trim. The consistent color palette and the defined trim create a clean and sophisticated look – a successful transition. This contrasts with a scenario where bright red stucco abruptly meets beige vinyl siding without any transition element. The stark color difference and lack of a defined line create a visually jarring and unprofessional appearance – an unsuccessful transition. Another example of a successful transition might involve using textured vinyl siding that mimics the texture of the stucco, minimizing the visual contrast. Conversely, using a highly glossy vinyl siding against a matte stucco creates a strong contrast that can be visually unappealing unless carefully managed with complementary colors and substantial trim.
Comparison of Transition Styles
| Transition Style | Description | Visual Description |
|---|---|---|
| Corner Trim | A decorative trim piece that covers the exterior corner where the siding and stucco meet. | Imagine a wide, L-shaped piece of trim, painted to match either the stucco or siding, neatly covering the joint and providing a clean, finished look. |
| J-Channel | A J-shaped metal or vinyl piece is used to finish the edge of the vinyl siding where it meets the stucco. | Picture a simple, unobtrusive metal or vinyl channel that neatly covers the edge of the vinyl siding, creating a smooth transition to the stucco. It’s less visually prominent than the corner trim. |
| Rake Trim | Used along the edges of the roofline where the siding and stucco meet. | Visualize a trim piece running along the edge of the roof, matching the color scheme of the siding and stucco, providing a clean and finished look to the roofline transition. |
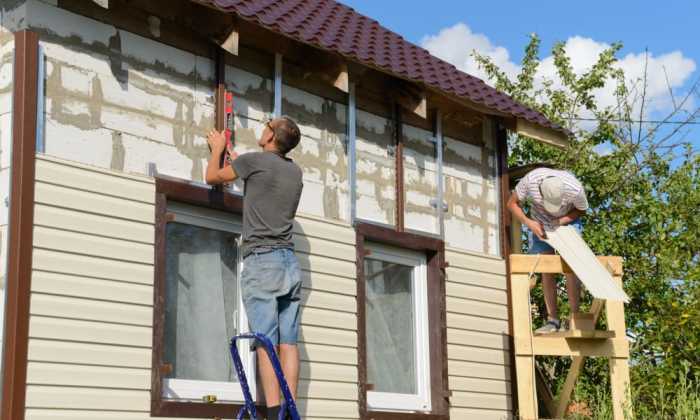
Material Compatibility and Installation Techniques

Source: oldhouseguy.com
Successfully transitioning from vinyl siding to stucco requires careful consideration of material compatibility and precise installation techniques. Ignoring these factors can lead to costly repairs down the line, including water damage, cracking, and aesthetic inconsistencies. Proper preparation is key to a long-lasting and attractive finish.
Surface Preparation
Before installing any transition trim, both the vinyl siding and stucco surfaces need thorough preparation. The vinyl siding should be clean and free of any loose or damaged pieces. Any gaps or cracks should be filled with a compatible caulk or sealant. The stucco surface needs to be sound and dry. Any loose or crumbling stucco should be removed and repaired. A smooth, even surface is crucial for a clean transition. Priming the stucco surface before applying the transition trim can enhance adhesion and prevent moisture issues.
Transition Trim Installation, Vinyl siding to stucco transition
Several types of transition trim are available, each with its installation method. J-channel trim is a common choice, offering a clean, professional look. It’s installed by first attaching it to the stucco, ensuring a tight seal. Then, the vinyl siding is slipped into the channel. Other options include L-channel trim, which can be used to cover the edge of the stucco, and specialized corner trim for inside and outside corners. Each type of trim requires careful measurement and cutting to ensure a precise fit. Remember to always follow the manufacturer’s instructions for the specific trim being used.
Flashing and Sealants
Proper flashing and sealing are essential to prevent water intrusion. Flashing, typically made of metal or plastic, should be installed behind the transition trim to create a water barrier. The flashing should extend beyond the edges of the trim and be securely fastened to both the siding and stucco. High-quality, weather-resistant sealant should be applied liberally around the entire perimeter of the trim to further prevent water leakage. Choose a sealant compatible with both vinyl and stucco. This step is critical, especially in areas prone to heavy rainfall or snow.
Securing the Transition
Several methods can be used to secure the transition trim. The best choice depends on the specific materials and the overall structure of the building.
- Nailing: This is a common method, especially for J-channel and L-channel trim. Advantages include speed and simplicity. Disadvantages include the potential for nail holes to be visible and the risk of damaging the trim if not done carefully. Use galvanized nails to prevent rust.
- Screwing: Offers a more secure fastening than nailing, particularly in areas subject to high winds. Advantages include superior holding power and less likelihood of the trim pulling away. Disadvantages include a slightly more complex installation process and the possibility of screw heads being visible unless countersunk.
- Adhesive: Construction adhesive can be used alone or in conjunction with nailing or screwing. Advantages include a strong bond and excellent weather resistance. Disadvantages include a longer curing time and the need for precise application to ensure a strong, even bond. It is best suited for smaller, less exposed areas.
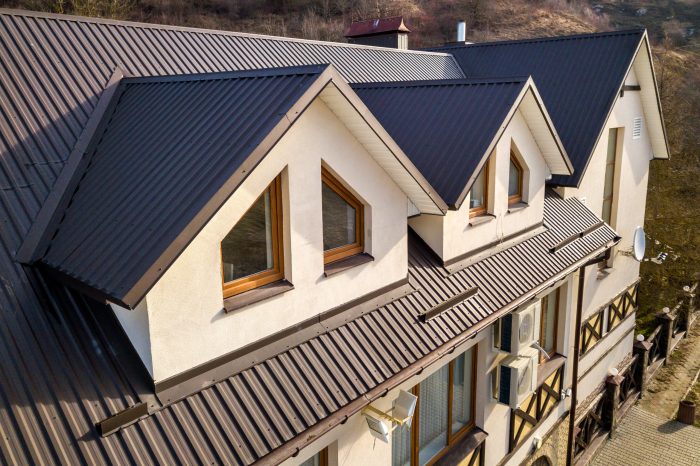
Addressing Structural Challenges
Source: coloradowindowanddoor.com
Getting a seamless transition between vinyl siding and stucco isn’t always a walk in the park. Differences in wall thickness, uneven surfaces, and tricky corner configurations can create real headaches. Proper planning and execution are key to avoiding structural problems and ensuring a long-lasting, aesthetically pleasing result. This section focuses on identifying and resolving these common structural challenges.
Uneven surfaces and differing wall thicknesses are frequent culprits in vinyl-to-stucco transitions. These inconsistencies can lead to gaps, cracks, and an overall unprofessional look. Moreover, they can compromise the structural integrity of the transition, leading to potential water damage and other issues down the line. Addressing these challenges requires careful planning and the use of appropriate techniques to create a solid and even foundation for the transition.
Shimming and Framing Techniques
Shimming is a crucial technique for leveling uneven surfaces before installing the transition. This involves using thin pieces of wood or other suitable material to fill gaps and create a consistent plane. For larger discrepancies, framing may be necessary. This involves adding additional framing members to the wall to build up the surface to the required level. Imagine a situation where the stucco wall is significantly recessed compared to the vinyl-sided area. You’d first carefully measure the difference, then install strategically placed furring strips or blocking to bring the stucco wall flush with the vinyl siding before applying the transition trim. This ensures a proper fit and prevents gaps that could compromise the weatherproofing. Always use corrosion-resistant fasteners appropriate for the materials involved.
Expansion Joint Implementation
Different materials expand and contract at different rates due to temperature changes. Failing to account for this can lead to cracking and damage to the transition. Expansion joints are critical in mitigating this issue. These are gaps built into the transition to allow for movement. These joints should be sealed with a flexible caulk to prevent water infiltration while still allowing for expansion and contraction. Consider a situation where the transition spans a significant length. Incorporating expansion joints every 8-10 feet, depending on the materials and climate, is a prudent measure to prevent cracking. The joint should be wide enough to accommodate the expected movement, and the sealant chosen must be durable and compatible with both vinyl and stucco.
Step-by-Step Installation on a Complex Wall Configuration
Let’s imagine a corner where the stucco wall is taller than the vinyl-sided wall. This scenario requires a multi-step approach:
- Assessment: Carefully measure the height difference and any irregularities in both surfaces at the corner.
- Framing (if needed): If the height difference is significant, add framing members to the shorter wall to bring it flush with the taller wall. Ensure the framing is plumb and level.
- Transition Installation: Begin by installing the transition piece on the taller wall (stucco) first, ensuring it’s properly aligned and secured. This provides a solid base for the shorter wall transition.
- Shorter Wall Transition: Install the transition piece on the shorter wall (vinyl siding), carefully aligning it with the piece already installed on the taller wall. This creates a neat and seamless corner transition.
- Caulking and Finishing: Caulk all seams and gaps using a high-quality, flexible caulk designed for exterior use. This will seal the transition, preventing water penetration and ensuring a weather-tight seal.
This step-by-step process, adapted to the specific dimensions and conditions of each project, ensures a structurally sound and aesthetically pleasing transition. Remember that careful planning and attention to detail are key to a successful outcome.
Cost Analysis and Material Selection

Source: cdpstucco.com
Choosing the right materials and methods for your vinyl siding to stucco transition is crucial, not just for aesthetics, but also for long-term cost-effectiveness. A poorly planned transition can lead to costly repairs down the line, so careful consideration of materials, labor, and potential unforeseen issues is essential. This section will break down the costs associated with different approaches, helping you make an informed decision.
Material Costs Comparison
Different transition materials offer varying levels of durability, aesthetics, and cost. Aluminum flashing, for example, is relatively inexpensive but might not offer the same level of aesthetic integration as a custom-fabricated transition piece. Pre-fabricated transitions, while more expensive upfront, can save on labor costs and often provide a more seamless finish. The cost of materials also varies greatly depending on the size and complexity of the transition area.
| Material | Cost per Linear Foot (Estimate) | Lifespan (Years) | Maintenance |
|---|---|---|---|
| Aluminum Flashing | $2 – $5 | 15-20 | Minimal; occasional cleaning |
| Pre-fabricated Transition Pieces (Vinyl/Stucco) | $10 – $30 | 20-30 | Low; occasional cleaning |
| Custom-fabricated Transition (Metal or Composite) | $20 – $50+ | 25-40+ | Moderate; periodic inspection and repainting (if applicable) |
| J-Channel and Trim | $3-$8 | 10-15 | Low; occasional cleaning and repainting |
Labor Cost Estimation
Labor costs can significantly impact the overall project expense. A simple transition might only require a few hours of labor, while a complex transition with custom fabrication could take much longer. Factors such as the height of the wall, accessibility, and the complexity of the design will influence labor costs. Always obtain multiple quotes from experienced contractors to compare pricing. Consider factors like experience, licensing, and insurance when choosing a contractor.
Creating a Cost Estimate
To create a comprehensive cost estimate, consider the following steps:
1. Measure the length of the transition area. This is crucial for accurately calculating material quantities.
2. Choose your transition materials. Based on your budget and aesthetic preferences, select the materials that best suit your needs.
3. Obtain quotes from multiple contractors. Compare their pricing and ensure they are licensed and insured.
4. Factor in potential unforeseen expenses. This might include additional materials, unexpected repairs, or adjustments needed during installation.
Sample Cost Breakdown (10-foot Transition)
This example uses average costs and should be adjusted based on your specific project.
| Cost Item | Material Cost | Labor Cost | Contingency (10%) |
|---|---|---|---|
| Pre-fabricated Transition Pieces | $100 | $150 | $25 |
| Caulk and Sealant | $20 | – | $2 |
| Other Materials (fasteners, etc.) | $30 | – | $3 |
| Total Estimated Cost | $150 | $150 | $30 |
| Total Project Cost | $330 | ||
Building Codes and Regulations: Vinyl Siding To Stucco Transition
Source: vinylsidingdoctor.com
Successfully transitioning from vinyl siding to stucco requires careful adherence to local building codes and regulations. Ignoring these rules can lead to project delays, costly rework, and even safety hazards. Understanding these requirements is crucial for a smooth and legally compliant project.
Building codes vary significantly by location, reflecting local climate conditions, seismic activity, and other factors. These codes often specify requirements for materials, installation methods, fire resistance, and overall structural integrity. For exterior wall coverings, these regulations might cover things like the type of flashing used, the proper installation of water barriers, and the minimum thickness of stucco. Transitions between different materials, like vinyl siding and stucco, often require special attention to ensure a weathertight and durable seal.
Relevant Building Codes and Regulations
Local building departments are the primary source of information regarding applicable codes. These codes often reference nationally recognized standards, such as the International Building Code (IBC) and the International Residential Code (IRC). Specific requirements related to exterior wall coverings and transitions are usually found within sections addressing wall assemblies, water resistance, and fire safety. For example, the IBC might specify minimum fire ratings for exterior wall assemblies, influencing the choice of materials and their installation methods at the transition point. Consult your local building department for specific requirements and references to the applicable codes within your jurisdiction. They can provide copies of relevant code sections or direct you to online resources.
Permitting Requirements
Obtaining the necessary permits before commencing work is non-negotiable. Permits demonstrate compliance with building codes and provide a level of oversight to ensure the project’s safety and adherence to regulations. The application process typically involves submitting detailed plans and specifications of the project, including details of the vinyl siding to stucco transition. Inspectors may visit the site at various stages of construction to verify compliance. Failing to obtain permits can result in significant fines and potential project shutdowns. The cost of permits varies depending on the project’s scope and location.
Ensuring Compliance with Building Standards
Meeting building standards requires meticulous attention to detail throughout the project. This includes using approved materials, following prescribed installation techniques and ensuring proper flashing and sealing at the transition point. Detailed drawings and specifications should be prepared and submitted with the permit application. These documents should clearly illustrate the proposed transition method, materials to be used, and the intended approach to waterproofing and fire protection. Regular communication with the building inspector throughout the project helps to address any concerns promptly and ensures compliance. This proactive approach minimizes the risk of delays and costly rework. A final inspection is typically required upon completion of the project to verify compliance before the permit is closed.
Last Point

Source: conservationconstruction.com
Mastering the vinyl siding to stucco transition is about more than just slapping some trim in place; it’s about creating a cohesive and long-lasting exterior that enhances your home’s curb appeal. By carefully considering the aesthetic aspects, ensuring proper installation techniques, addressing potential structural challenges, and understanding the associated costs and building regulations, you can achieve a truly professional and beautiful result. Remember, attention to detail and meticulous execution are key to a successful transition that will stand the test of time.