Cover Stucco with Siding A Homeowners Guide
Cover stucco with siding? It’s a popular choice for homeowners looking to upgrade their home’s exterior. This guide dives into the reasons why people choose this route, exploring the various siding options available, and walking you through the entire process from preparation to installation. We’ll cover everything from choosing the right materials to tackling potential problems along the way, ensuring you’re well-equipped to handle this home improvement project. Get ready to transform your home’s curb appeal!
Whether you’re dealing with damaged stucco, aiming for a more modern aesthetic, or simply seeking lower maintenance, covering your stucco with siding offers a compelling solution. This guide will help you navigate the different types of siding, their pros and cons, and the steps involved in a successful installation. We’ll also address common challenges and provide tips for budgeting your project effectively.
Reasons for Covering Stucco with Siding: Cover Stucco With Siding

Source: utahsidingexteriors.com
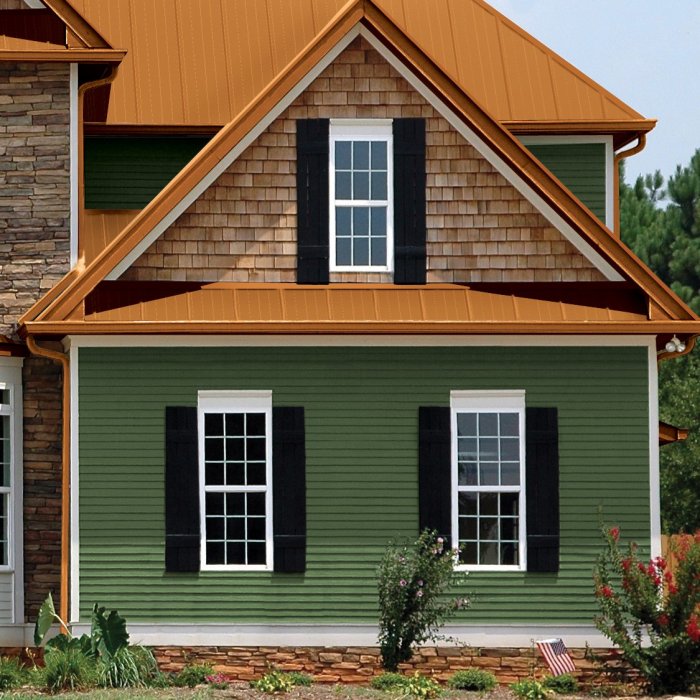
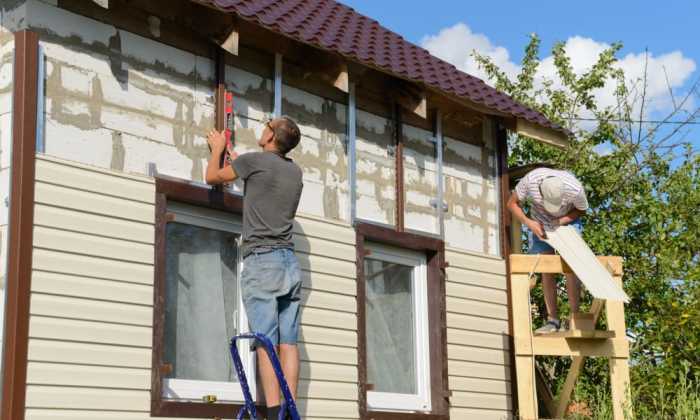
So, you’re considering covering your stucco house with siding? It’s a big decision, but often a worthwhile one. Many homeowners opt for this change due to a combination of aesthetic preferences and practical concerns related to stucco’s maintenance demands. Let’s explore the reasons behind this popular home renovation.
Many homeowners choose to cover stucco with siding primarily due to maintenance and aesthetic concerns. Stucco, while durable, can be prone to cracking, chipping, and water damage, leading to costly repairs. Siding, particularly vinyl or fiber cement, often offers a lower-maintenance alternative with a longer lifespan and greater resistance to these issues. The visual appeal also plays a significant role; siding offers a wider range of styles and colors compared to stucco, allowing for greater customization and a more modern or updated look.
Maintenance and Repair Costs
The long-term cost of maintaining stucco versus siding is a major factor in this decision. Stucco repairs, particularly for larger cracks or water damage, can be expensive and time-consuming. The cost of patching, repainting, and addressing water intrusion can quickly add up over the years. Siding, on the other hand, typically requires less frequent and less expensive maintenance. Minor repairs, like replacing a damaged panel, are usually straightforward and less costly than extensive stucco repairs. For example, repairing a small crack in stucco might cost $100-$200, while replacing a damaged siding panel might only cost $50-$100. Over the lifespan of a home, these smaller, more frequent repairs for siding can end up being significantly less expensive than the occasional, but potentially massive, stucco repair bills.
Aesthetic Considerations
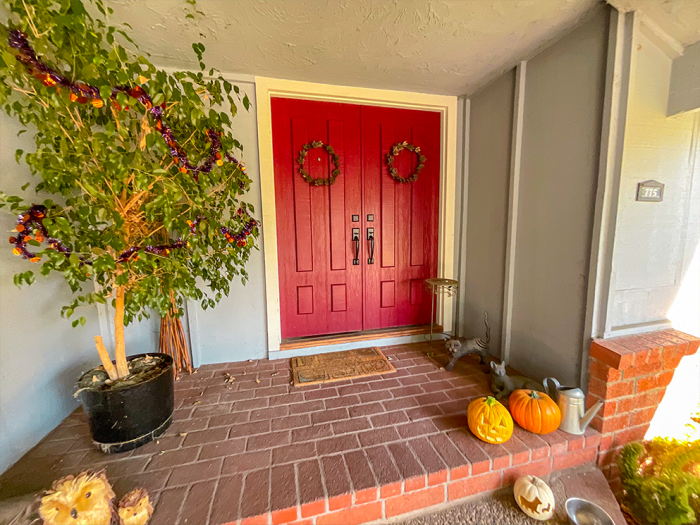
The aesthetic appeal of siding often surpasses that of stucco, particularly for homeowners seeking a more contemporary or updated look. Siding offers a much wider variety of colors, textures, and styles, from sleek modern panels to rustic wood-like finishes. Stucco, while available in various colors, tends to have a more uniform and less versatile appearance. For example, a homeowner might choose to cover dated, textured stucco with clean, modern-looking vinyl siding to enhance their home’s curb appeal and increase its market value. The ability to easily change the siding’s color or style in the future also adds to its aesthetic appeal and flexibility.
Situations Where Siding is the Best Solution
Covering stucco with siding is often the best solution in situations where the stucco is severely damaged, showing significant signs of cracking, water damage, or mold growth. These issues can compromise the structural integrity of the home and lead to significant repair costs. In such cases, covering the stucco with siding provides a more cost-effective and efficient way to protect the home and improve its appearance. Furthermore, if the homeowner desires a different aesthetic, such as a more modern or updated look, siding provides the flexibility to achieve this without the expense and hassle of completely removing and replacing the stucco. For instance, a home with aged, discolored stucco might benefit significantly from the application of new siding to rejuvenate its exterior.
Types of Siding Suitable for Covering Stucco

Source: crownremodelingllc.com
Choosing the right siding to cover your stucco is a crucial decision impacting both the aesthetics and longevity of your home. Several factors, including budget, desired look, and climate, influence this choice. Let’s explore some popular options.
Vinyl Siding
Vinyl siding is a widely popular choice for its affordability and ease of installation. It comes in a vast array of colors and styles, mimicking the look of wood or even stone. However, vinyl can be susceptible to damage from impact and extreme temperatures, and it’s not as durable as some other options. Its lifespan is generally shorter than fiber cement or metal siding. Installation over stucco involves attaching furring strips to create an air gap for ventilation and then installing the vinyl siding using nails or staples. The air gap helps prevent moisture buildup, a crucial consideration when covering stucco.
Fiber Cement Siding
Fiber cement siding offers a superior balance of durability, aesthetics, and longevity. Made from a composite of cement, cellulose fibers, and sand, it’s highly resistant to fire, rot, insects, and impact. It mimics the look of wood remarkably well and comes in various textures and colors. However, it is heavier than vinyl and more expensive to purchase and install. The installation process is similar to vinyl, requiring furring strips for proper ventilation and spacing. The weight of fiber cement necessitates more robust fastening.
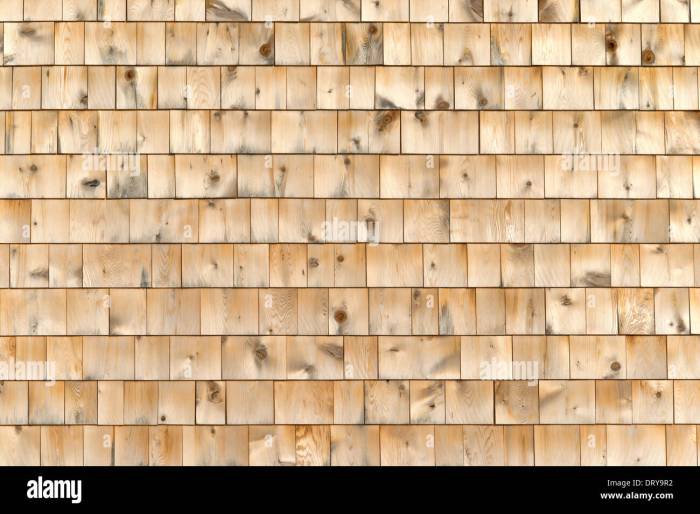
Wood Siding, Cover stucco with siding.
Wood siding offers a classic, natural look and can significantly increase your home’s curb appeal. However, it requires more maintenance than other siding types, needing regular painting or staining to protect it from the elements. Wood is also susceptible to rot, insect infestation, and fire damage. Proper preparation of the stucco surface, including ensuring it’s dry and level, is critical before installing wood siding. Installation typically involves attaching the wood siding directly to furring strips, using appropriate fasteners, and ensuring proper spacing for ventilation.
Metal Siding
Metal siding, typically made of aluminum or steel, is incredibly durable and long-lasting. It’s highly resistant to fire, rot, and insects, and requires minimal maintenance. Metal siding is also available in a variety of colors and styles, although it’s often less visually appealing to some than wood or fiber cement. It’s more expensive than vinyl but generally less expensive than fiber cement. Installation is similar to other siding types, involving the use of furring strips to create a ventilation gap and secure fastening to the underlying structure.
Siding Material Comparison
| Siding Type | Lifespan (Years) | Maintenance | Price Range (per sq ft) |
|---|---|---|---|
| Vinyl | 20-30 | Low | $1-$4 |
| Fiber Cement | 50+ | Moderate | $3-$8 |
| Wood | 20-40 (depending on maintenance) | High | $4-$10+ |
| Metal | 50+ | Low | $2-$6 |
Preparing the Stucco Surface for Siding Installation

Source: statelineext.com
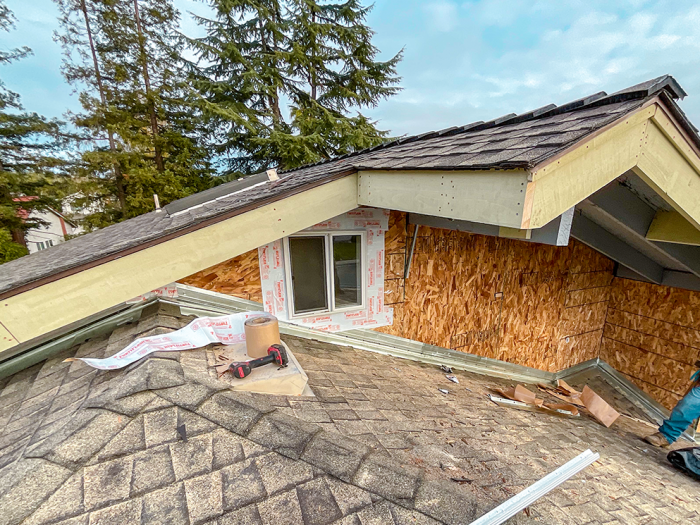
Proper stucco surface preparation is crucial for a long-lasting and aesthetically pleasing siding installation. Neglecting this step can lead to problems like poor adhesion, moisture intrusion, and premature siding failure. This section details the necessary steps to ensure your stucco is ready for its new covering.
Stucco Surface Assessment and Repair
Before you even think about cleaning, you need a thorough inspection of your stucco. Look for cracks, holes, loose or crumbling sections, and any signs of water damage. Addressing these issues before siding installation is vital for preventing future problems. Small cracks can be filled with high-quality exterior-grade caulk. Larger cracks or holes may require patching with a stucco repair compound that matches the existing stucco’s color and texture. Remember to allow ample drying time before proceeding to the next step. For extensive damage, professional stucco repair might be necessary.
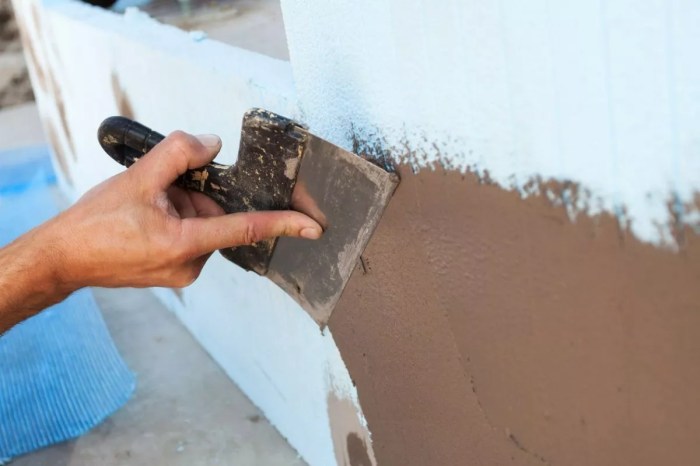
Cleaning and Prepping the Stucco Surface
A clean surface is key to achieving optimal adhesion between the stucco and the new siding. Begin by removing any loose or flaking stucco using a wire brush or scraper. Then, thoroughly clean the entire surface using a pressure washer set to a low-pressure setting to avoid damaging the stucco. Pay close attention to areas with dirt, mildew, or algae growth. A solution of water and a mild detergent can be used to remove stubborn stains. After washing, allow the stucco to dry completely before proceeding. Finally, prime the surface with a high-quality exterior primer designed for stucco. This will improve adhesion and help prevent moisture problems.
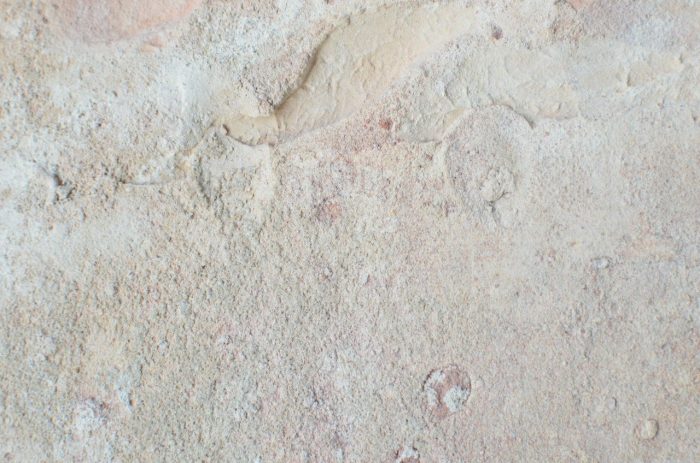
Addressing Moisture Issues in Stucco Walls
Moisture is the enemy of any exterior wall, and stucco is particularly susceptible. Before installing siding, it’s critical to address any existing moisture problems. Look for signs of water damage like staining, blistering paint, or efflorescence (white, powdery deposits). If you find signs of moisture intrusion, you may need to identify and repair the source of the leak (such as damaged flashing or roof gutters). Consider using a moisture meter to check the moisture content of the stucco. If the moisture level is high, you’ll need to allow the wall to dry completely before proceeding with siding installation. In severe cases, professional help may be needed to address underlying structural issues causing moisture problems. Proper ventilation is also crucial in preventing future moisture buildup.
Siding Installation Techniques and Methods
Source: plasteringsolutionsusa.com
Installing siding over stucco requires careful consideration of the substrate and the chosen siding material. The goal is to create a durable, weather-resistant, and aesthetically pleasing exterior. Two primary methods exist: direct application and installation over furring strips. Proper ventilation and moisture barriers are crucial regardless of the chosen method.
Direct Application of Siding to Stucco
Direct application involves attaching siding directly to the stucco surface. This method is generally faster and less expensive than using furring strips, but it requires a very smooth and sound stucco surface. Any imperfections or loose areas must be addressed beforehand. This method is best suited for thinner siding materials like certain types of vinyl or fiber cement siding. It’s crucial to ensure the stucco is adequately primed and that appropriate fasteners are used to prevent damage to the underlying stucco.
Siding Installation Over Furring Strips
Installing siding over furring strips creates an air gap between the stucco and the siding, improving ventilation and reducing the risk of moisture problems. Furring strips, typically 1×2 or 1×3 lumber, are attached to the stucco using appropriate fasteners, creating a framework for the siding. This method is ideal for thicker siding materials, such as wood or thicker fiber cement, and allows for easier installation and better management of irregularities in the stucco surface. The air gap also helps to equalize temperature fluctuations, potentially reducing energy costs.
Ventilation and Moisture Barriers
Proper ventilation is essential to prevent moisture buildup within the wall assembly. A moisture barrier, such as a house wrap, should be installed over the stucco before attaching furring strips or directly applying siding (depending on the chosen method). This barrier prevents moisture from penetrating the wall, protecting the stucco and the underlying structure. Proper ventilation is achieved by leaving gaps at the bottom and top of the siding installation to allow air circulation. This can involve using vented soffits and ridge vents.
Step-by-Step Guide for Siding Installation Over Stucco
- Preparation: This involves cleaning the stucco surface thoroughly to remove loose debris, dirt, and any mildew. Repairing any cracks or damaged areas is also critical. A thorough inspection for loose stucco is paramount. [Image description: A close-up image showing a worker using a wire brush to clean a stucco wall, highlighting the removal of loose particles and revealing a clean, prepared surface. The image also shows some minor cracks that have been filled and repaired.]
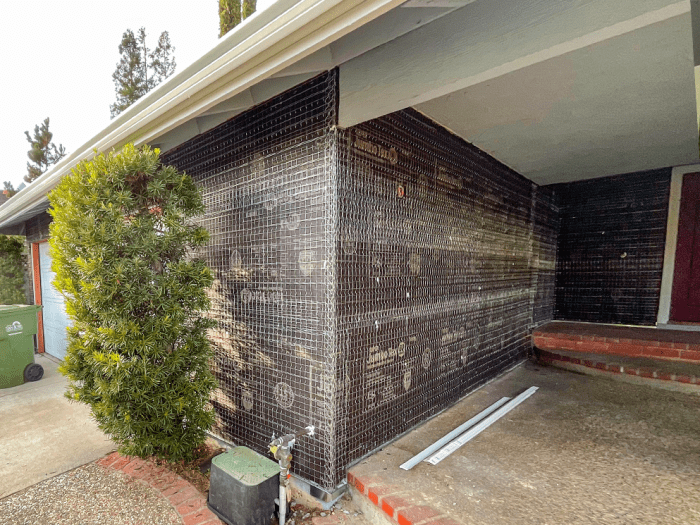
- Moisture Barrier Installation (if applicable): If using a moisture barrier, carefully install it, overlapping seams and sealing them with appropriate tape. [Image description: A wide shot depicting a worker carefully installing house wrap over a stucco wall, demonstrating proper overlapping and taping techniques to ensure a continuous, watertight seal. The image shows the house being stapled to the stucco wall.]
- Furring Strip Installation (if applicable): If using furring strips, attach them to the stucco using corrosion-resistant fasteners, ensuring they are level and plumb. Spacing should be consistent with the siding manufacturer’s recommendations. [Image description: A detailed close-up of furring strips being attached to the stucco wall with screws, showing the even spacing and the use of a level to ensure proper alignment. The image emphasizes the use of appropriate fasteners.]
- Siding Installation: Begin installing the siding at a corner or edge, following the manufacturer’s instructions. Use appropriate fasteners and ensure proper overlap. [Image description: A view of a worker installing siding panels, showing the correct overlap and the use of a nail gun or other appropriate fastening tool. The image showcases a section of the wall already completed with siding, demonstrating the consistent and neat installation.]
- Finishing: Install trim pieces, corner boards, and other necessary finishing elements to complete the installation. [Image description: A wide shot of a completed siding installation over stucco, highlighting the neatly installed trim pieces, corner boards, and other finishing details. The image showcases a clean and professional finish.]
Comparison of Installation Techniques
Direct application is generally less expensive and faster than using furring strips. However, it requires a perfect stucco surface and may not offer the same level of protection against moisture and temperature fluctuations. Using furring strips adds cost and time to the project, but it provides better ventilation, and moisture protection, and accommodates imperfections in the stucco. The best method depends on the specific project requirements, budget, and the type of siding being used. For example, a homeowner with a relatively smooth stucco surface and a limited budget might opt for direct application of vinyl siding, while a project with significant stucco imperfections and a desire for superior insulation might justify the higher cost of installing siding over furring strips.
Addressing Potential Challenges and Complications
Source: plasteringsolutionsusa.com
Covering stucco with siding presents several potential challenges, ranging from surface irregularities to underlying issues like water damage. Careful planning and preparation are key to a successful project, minimizing potential problems and ensuring a long-lasting, aesthetically pleasing result. Understanding these potential issues beforehand allows for proactive solutions and avoids costly rework.
Uneven stucco surfaces and difficult-to-reach areas present significant installation hurdles. These irregularities can lead to gaps in siding, compromising the building’s weather resistance and overall appearance. Difficult-to-reach areas, such as high gables or complex architectural details, require specialized techniques and potentially more time to complete the work properly.
Dealing with Uneven Stucco Surfaces
Addressing uneven stucco requires careful preparation. Minor imperfections can often be addressed with a skim coat of cement-based patching compound, allowing for a smoother surface for siding installation. For more significant irregularities, furring strips—thin wooden strips attached directly to the stucco—can create a level plane for the siding. This creates an even surface and avoids the need for excessive amounts of patching compound. Remember to allow the patching compound ample drying time before proceeding with siding installation. For extremely uneven surfaces, consider using a thicker layer of insulation board before installing furring strips to help create a level surface while also improving insulation.
Addressing Difficult-to-Reach Areas
High gables or intricate architectural details demand creative installation techniques. Using shorter lengths of siding or specialized tools like pneumatic nailers can improve access and efficiency. In some cases, scaffolding or specialized lifts might be necessary to ensure worker safety and proper installation. Pre-cutting siding pieces to fit complex angles before installation can significantly speed up the process and reduce the risk of on-site errors. Consider using flexible siding materials in areas with curves or intricate designs.
Addressing Water Damage and Mold
Water damage or mold behind the stucco is a serious issue requiring immediate attention before siding installation. This necessitates identifying the source of the moisture problem (leaky pipes, damaged flashing, etc.) and addressing it completely. This may involve repairs to roofing, plumbing, or other building systems. Once the moisture problem is resolved, the affected stucco areas must be thoroughly dried and treated with a mold-killing solution before any new siding is applied. In severe cases, damaged stucco may need to be removed and replaced before siding installation can begin. Proper ventilation behind the new siding is crucial to prevent future moisture issues.
Troubleshooting Siding Installation Problems
A troubleshooting guide should address common installation problems.
| Problem | Solution |
|---|---|
| Gaps between siding and stucco | Use furring strips for leveling, ensure proper siding alignment, and use appropriate caulking to seal gaps. |
| Siding buckling or warping | Ensure proper acclimation of siding before installation, avoid over-fastening, and check for moisture behind the siding. |
| Difficulty fastening siding to stucco | Use appropriate fasteners (masonry nails or screws) and pilot holes to prevent cracking or splitting. |
| Uneven siding alignment | Use level and plumb lines for guidance, and double-check measurements before installation. |
Cost Considerations and Budgeting
Source: allclimatepainting.com
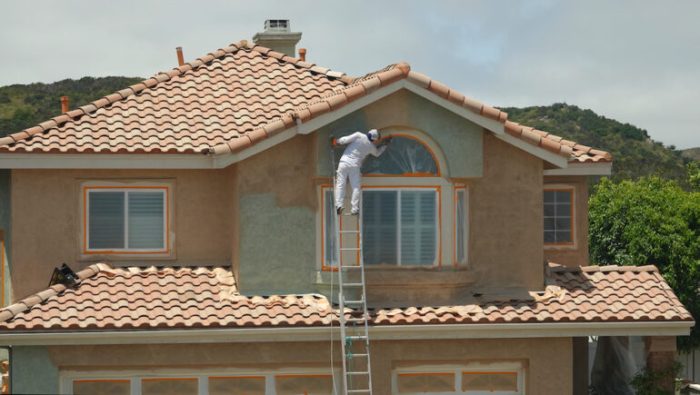
Covering your stucco with siding is a significant home improvement project, and understanding the associated costs is crucial for successful planning and execution. Failing to accurately budget can lead to project delays, financial strain, and ultimately, a less-than-satisfactory outcome. This section breaks down the various cost components, provides budgeting tips, and offers a sample budget to help you navigate this process effectively.
Material Costs
Material costs represent a significant portion of your overall budget. The type of siding you choose will drastically influence this expense. Vinyl siding is generally the most affordable option, while fiber cement and wood siding can be considerably more expensive. Additionally, consider the need for additional materials such as flashing, underlayment, fasteners, and caulking. These seemingly small items can add up quickly. Remember to factor in waste; it’s always wise to purchase slightly more material than your calculations suggest to account for cuts, mistakes, and unforeseen circumstances. For example, a 1500-square-foot house might require approximately 1600 square feet of siding to account for waste and ensure a sufficient supply. Pricing will vary greatly depending on the region and supplier but expect to pay anywhere from $1 to $10 per square foot for materials, excluding labor.
Labor Costs
Labor costs can be substantial, often exceeding the cost of materials. The complexity of the project, the size of your house, and the experience level of the contractor will all affect labor charges. You might consider hiring a general contractor who can manage the entire project or individual contractors for different phases (demolition, installation, etc.). It’s recommended to obtain multiple quotes from different contractors to compare pricing and services offered. For a medium-sized project, labor costs could range from $5,000 to $20,000 or more, depending on location and project complexity.
Permitting Costs
Building permits are usually required for exterior home renovations of this scale. The cost of permits varies significantly depending on your location and the scope of the project. It’s essential to check with your local building department to determine the specific requirements and associated fees before starting any work. Failing to obtain the necessary permits can result in fines and potential legal issues. Expect permit costs to range from a few hundred to several thousand dollars.
Creating a Realistic Budget
Creating a realistic budget requires meticulous planning and research. Start by obtaining detailed quotes from multiple contractors, ensuring they control all materials and labor costs. Factor in contingency funds (10-20% of the total estimated cost) to cover unexpected expenses or potential price increases. Spread out payments according to the project timeline, and always review the contract carefully before signing. Consider using budgeting software or spreadsheets to track expenses and monitor progress. A well-defined budget helps to manage expectations and prevent cost overruns.
Cost Comparison of Siding Materials and Installation Methods
The table below illustrates a simplified cost comparison of various siding materials and installation methods. Note that these are estimates and can vary widely based on location, contractor, and project specifics.
| Siding Material | Material Cost per sq ft | Labor Cost per sq ft | Total Estimated Cost per sq ft |
|---|---|---|---|
| Vinyl | $1-$3 | $2-$5 | $3-$8 |
| Fiber Cement | $3-$7 | $4-$8 | $7-$15 |
| Wood | $5-$15 | $6-$12 | $11-$27 |
Sample Budget
This is a sample budget for covering 1500 square feet of stucco with vinyl siding. Remember to adjust these figures based on your specific project requirements and location.
| Expense Category | Estimated Cost |
|---|---|
| Materials (Vinyl Siding, Underlayment, Fasteners, etc.) | $2,400 – $4,800 |
| Labor (Installation, Demolition, etc.) | $7,500 – $15,000 |
| Permits | $500 – $2,000 |
| Contingency (15%) | $1,425 – $4,050 |
| Total Estimated Cost | $11,825 – $25,850 |
Closing Summary
Source: plasteringsolutionsusa.com
Transforming your home’s exterior by covering stucco with siding is a significant undertaking, but with careful planning and execution, it can be a rewarding experience. From understanding the reasons behind this popular choice to mastering the installation techniques, this guide has provided you with the essential knowledge to succeed. Remember to prioritize proper preparation, choose the right siding materials for your needs, and don’t hesitate to seek professional help when necessary. The result? A stunning and durable exterior that enhances your home’s value and curb appeal for years to come.