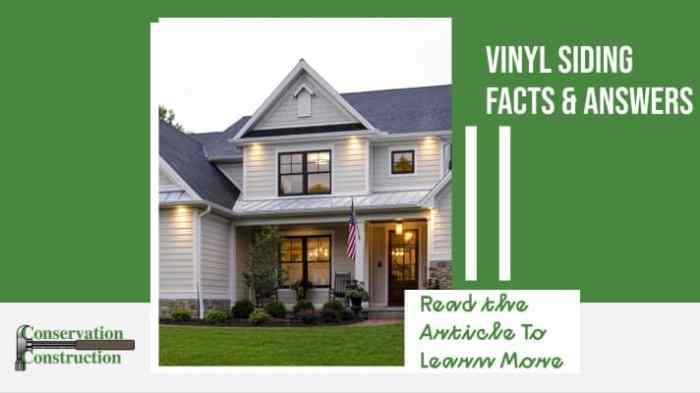
Vinyl Siding Over Stucco A Home Improvement Guide
Vinyl siding over stucco? It’s a popular choice for homeowners looking to update their home’s exterior. This project offers a blend of aesthetics and practicality, transforming the look of your house while potentially boosting its value and energy efficiency. We’ll cover everything from prep work and material selection to installation techniques and long-term maintenance, guiding you through a successful renovation.
This guide breaks down the process of installing vinyl siding over stucco into manageable steps. We’ll explore why homeowners choose this route, the materials involved, installation methods, and the costs associated. Whether you’re a DIY enthusiast or planning to hire a contractor, this information will empower you to make informed decisions.
Introduction to Vinyl Siding Over Stucco
Source: angi.com
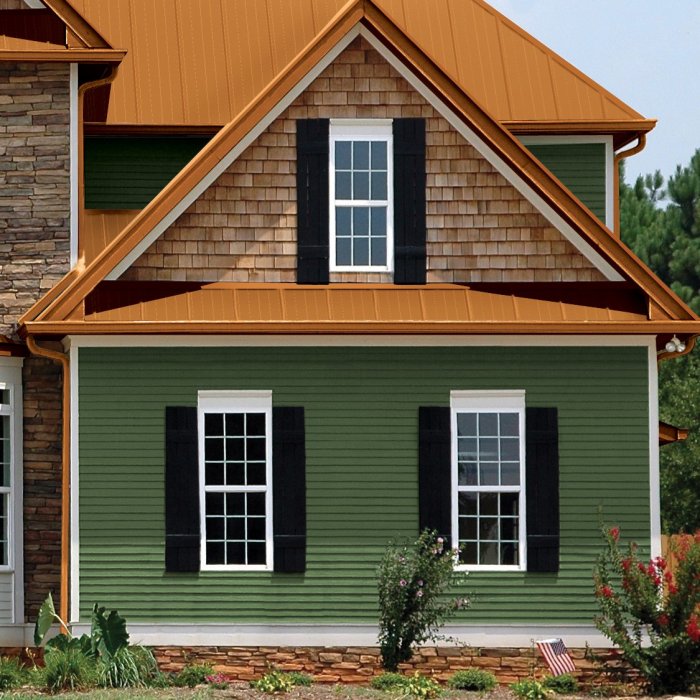
So, you’re thinking about covering your stucco house with vinyl siding? It’s a popular choice for a reason! This process can dramatically change the look of your home, and it offers several practical advantages. We’ll explore those reasons, the longevity of each material, and what you’ll need to get started.
Homeowners often choose vinyl siding over stucco for a variety of reasons. Stucco can be prone to cracking and water damage, especially in areas with fluctuating temperatures or harsh weather conditions. Repairing stucco can be costly and time-consuming. Vinyl siding, on the other hand, is relatively low-maintenance and resistant to these issues. It also offers a wider array of colors and styles, providing more flexibility in achieving a desired aesthetic. Finally, vinyl siding is generally less expensive to install than replacing or repairing damaged stucco.
Vinyl Siding and Stucco Lifespans
Vinyl siding typically lasts 20-50 years, depending on the quality of the siding and the climate. Proper installation and maintenance significantly extend its lifespan. Stucco, when properly installed and maintained, can last 50 years or more, but its susceptibility to cracking and water damage can shorten its life considerably. Think of a stucco home in a desert climate – the constant expansion and contraction from extreme temperature swings can cause cracking much sooner than in a more moderate climate. Conversely, a vinyl-sided home in the same desert environment would likely experience less deterioration due to its flexibility and resistance to moisture.
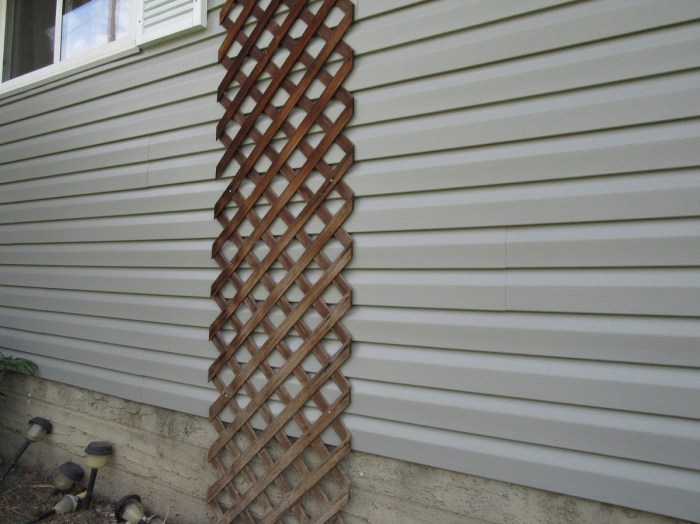
Materials and Tools Required
Before starting this project, gather the necessary materials and tools. You’ll need vinyl siding panels, J-channel, starter strips, corner trims, and any other finishing pieces needed to complete the look. Fasteners such as nails or screws specifically designed for vinyl siding are crucial. In addition to these, you’ll need measuring tools (tape measure, level), cutting tools (circular saw or utility knife), a hammer or drill, and safety equipment like gloves and safety glasses. Remember, always check the manufacturer’s instructions for specific recommendations on fasteners and installation techniques. Using the wrong type of nail, for example, could damage the siding and void any warranties.
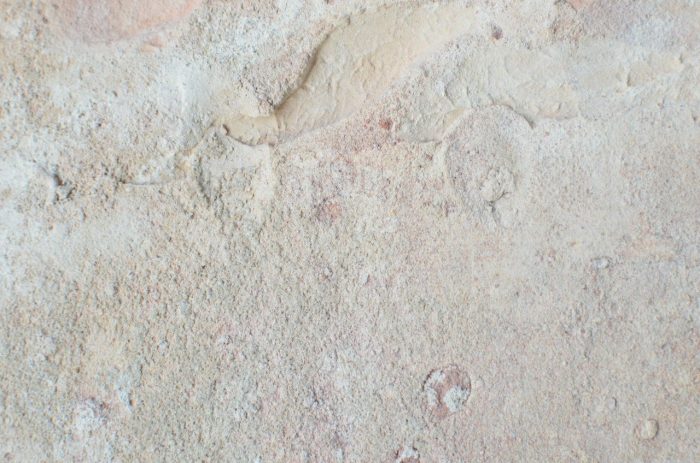
Preparation and Surface Evaluation

Source: cdpstucco.com
Getting your stucco ready for vinyl siding is crucial for a long-lasting, attractive finish. Proper preparation ensures the siding adheres well and prevents future problems. This involves a thorough inspection and addressing any existing issues before you even think about installing the first piece of siding.
Before starting, make sure you have all the necessary tools and materials gathered. This includes things like a wire brush, putty knife, caulk, primer, and any repair materials needed for cracks or damaged areas. Safety gear, such as gloves and eye protection, is also essential.
Stucco Surface Inspection and Repair
A comprehensive inspection is the first step. You’ll need to carefully examine the entire stucco surface for any defects. Look for cracks, loose or crumbling stucco, areas of water damage (staining or blistering), and any significant protrusions or unevenness. Small cracks can often be filled with a high-quality exterior-grade caulk, while larger cracks might require patching with stucco repair compound, ensuring proper adhesion and allowing sufficient drying time before further steps. Loose stucco needs to be removed completely down to a solid base before patching. Water damage requires addressing the source of the moisture problem first (like a leaky roof or faulty flashing) before any repairs are attempted, otherwise, the problem will simply reoccur. Significant protrusions or unevenness might need to be ground down for a smoother surface.
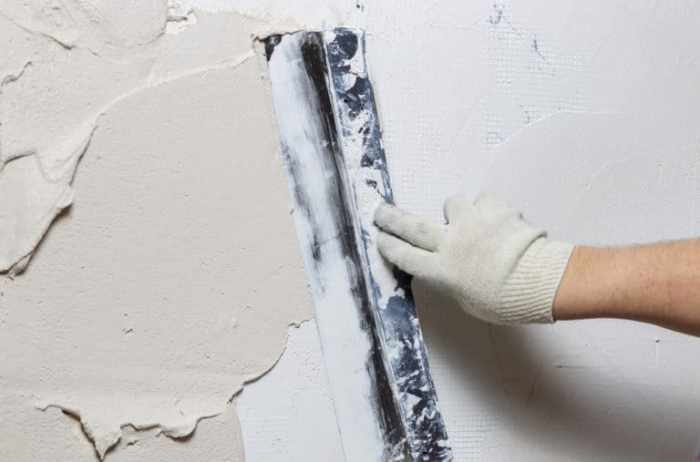
Cleaning the Stucco Surface
Once repairs are complete and fully cured, it’s time to thoroughly clean the stucco surface. This removes dirt, dust, mildew, and any loose debris that could interfere with the adhesion of the primer and siding. A pressure washer can be effective, but be cautious to avoid damaging the stucco. Start with a lower pressure setting and maintain a safe distance. A stiff-bristled brush can also be used for scrubbing, especially in areas where a pressure washer might not reach easily. Allow the surface to dry completely before proceeding. If mildew is present, use a suitable mildew-killing solution according to the manufacturer’s instructions, ensuring adequate ventilation and safety precautions.
Priming the Stucco Surface
Applying a quality exterior-grade primer is essential. Primer helps to create a uniform surface for the siding to adhere to, improving the overall bond and preventing future issues. It also seals the stucco, preventing moisture absorption and improving the longevity of the siding. Choose a primer specifically designed for stucco and follow the manufacturer’s instructions for application. Apply a thin, even coat, allowing it to dry completely before installing the vinyl siding. Multiple coats might be necessary depending on the porosity of the stucco and the primer used. Ensure the primer is completely dry before proceeding to the siding installation.
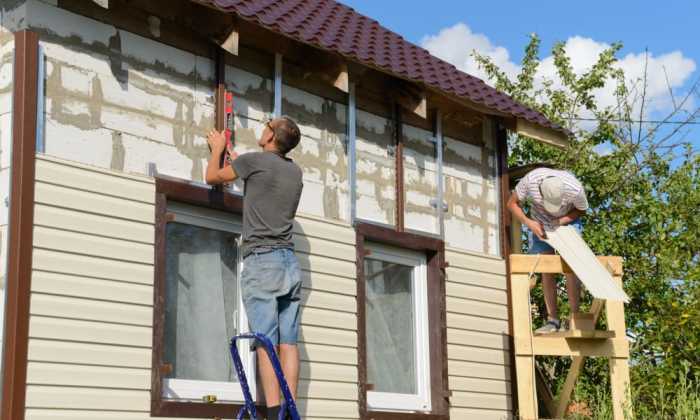
Installation Methods and Techniques
Source: whatisvinyl.com
Installing vinyl siding over stucco requires careful consideration of the substrate’s condition and the chosen installation method. The goal is to create a weather-resistant, aesthetically pleasing exterior. Two primary methods exist: direct application and installation over furring strips. Each has its advantages and disadvantages depending on the stucco’s condition and the desired outcome.
Vinyl Siding Installation Methods
Direct application involves attaching the vinyl siding directly to the stucco surface. This method is suitable only if the stucco is perfectly smooth, level, and free from cracks or loose areas. Any imperfections will show through the siding. Installing over furring strips, however, creates an air gap and a more even surface, hiding minor imperfections and improving insulation. This method is generally preferred, even for relatively smooth stucco.
Furring Strip Installation
Installing furring strips involves attaching horizontal strips of wood or metal directly to the stucco, creating a framework for the vinyl siding. This process begins with evaluating the stucco surface for any loose or damaged areas, which need repair before proceeding. Furring strips should be spaced appropriately (usually 16 inches in the center) and level, ensuring a consistent surface for the siding. They are fastened securely using appropriate fasteners, such as construction adhesive and screws, paying attention to proper spacing to avoid damaging the stucco. A level is crucial to guarantee a straight and even surface for the vinyl siding installation. Failure to properly level the furring strips will result in an uneven final appearance.
Flashing and Sealing for Water Intrusion Prevention
Proper flashing and sealing are paramount to prevent water damage. Flashing, typically made of metal or rubber, is installed at critical areas like window and door frames, corners, and around penetrations. This prevents water from seeping behind the siding. All seams and joints in the siding should be sealed with a high-quality, weatherproof sealant, preventing water from entering through gaps. Neglecting these steps can lead to significant water damage to the underlying stucco and framing.
| Step | Tool | Potential Problem | Solution |
|---|---|---|---|
| Installing Furring Strips | Level, measuring tape, drill, screws, construction adhesive | Uneven furring strips | Use a level frequently and adjust strips as needed; consider shims for leveling. |
| Installing Flashing | Utility knife, metal shears, sealant, flashing tape | Improper flashing placement | Ensure proper overlap and sealing of all flashing seams; use flashing tape for added security. |
| Attaching Vinyl Siding | Nail gun, siding clips, measuring tape, level | Improper siding alignment | Use a level to ensure straight lines and consistent spacing; use siding clips for added support. |
| Sealing Seams and Joints | Caulk gun, weatherproof sealant | Inadequate sealing | Use a generous amount of sealant; to ensure complete coverage of all seams and joints. |
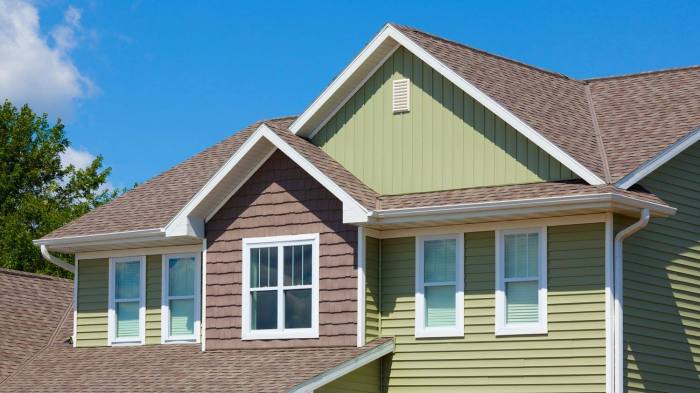
Choosing the Right Vinyl Siding
Source: Squarespace-cdn.com
Choosing the right vinyl siding for your stucco house involves careful consideration of several factors. The siding needs to not only look good but also provide durable protection for your home, withstand the elements, and complement the existing stucco. Making informed decisions about color, style, and material quality will ensure a long-lasting and aesthetically pleasing result.
Selecting vinyl siding that’s compatible with stucco is crucial for a successful project. Stucco’s texture and potential for expansion and contraction necessitate a siding that can accommodate these movements without cracking or buckling. Furthermore, proper ventilation behind the siding is essential to prevent moisture buildup, which can damage both the stucco and the vinyl.
Vinyl Siding Profiles and Suitability for Stucco
Different vinyl siding profiles offer varying aesthetic appearances and levels of suitability for stucco homes. Clapboard siding, with its classic overlapping design, is a popular and versatile choice. Its relatively smooth surface makes it a good option for homes with less textured stucco. Shake siding, designed to mimic the look of natural wood shakes, provides a more rustic and textured appearance. However, its rougher texture might not be ideal for stucco with pronounced irregularities. Consider the overall architectural style of your home when selecting a profile; a contemporary home might look better with sleek, smooth siding, while a more traditional home could benefit from a textured profile like a shake.
Color and Style Considerations
Color selection is a significant factor influencing the overall look of your home. Consider the existing color of your stucco and the surrounding landscape. Neutral colors tend to be more versatile and timeless, while bolder colors can make a statement. High-quality vinyl siding offers a wide range of color options, including various shades of white, gray, beige, and brown. The style of the siding should complement the architectural style of your home and the existing stucco. For example, a ranch-style home might look best with a simple, clean clapboard siding, while a Victorian home might suit a more ornate profile.
Material Quality and Warranty
Investing in high-quality vinyl siding is essential for long-term durability and performance. Look for siding with a thick gauge, which indicates greater strength and resistance to impact damage. Thicker siding is less likely to dent or warp over time. A good warranty is a crucial indicator of the manufacturer’s confidence in their product. Reputable manufacturers typically offer warranties that cover fading, cracking, and other defects for a significant period, often 20-30 years or more. Choosing siding with UV protection is crucial to minimize fading, ensuring your siding retains its color and appearance for years to come. Resistance to impact damage is another important factor, especially if you live in an area prone to hail or strong winds. High-impact vinyl siding can better withstand these conditions, reducing the risk of damage and costly repairs.
Cost Considerations and Budgeting: Vinyl Siding Over Stucco

Source: Squarespace-cdn.com
Replacing stucco with vinyl siding is a significant home improvement project, and understanding the associated costs is crucial for successful budgeting. This section breaks down the various expenses involved, compares vinyl siding to alternatives, and offers strategies for cost reduction.
The total cost of installing vinyl siding over stucco is highly variable, depending on several factors including the size of your home, the complexity of the project (e.g., requiring significant stucco removal or repairs), the quality of materials chosen, and your location (labor costs vary regionally). It’s essential to get multiple, detailed bids from reputable contractors to accurately assess the expense for your specific situation.
Cost Breakdown
A realistic budget should account for the following cost components:
- Materials: Vinyl siding itself, including necessary trim pieces, starter strips, and flashing, makes up a substantial portion of the cost. High-quality, durable siding will generally be more expensive than cheaper alternatives, but will likely last longer. Expect to pay anywhere from $2 to $8 per square foot for the siding materials alone, depending on the style and quality.
- Labor: Labor costs often represent the largest portion of the total expense. The complexity of the job, such as the need for extensive stucco removal or repairs to the underlying sheathing, will directly impact labor costs. Labor rates can range from $30 to $75 per hour, depending on the contractor’s experience and location.
- Permits: Building permits are usually required for exterior renovations of this scale. Permit fees vary by location and the scope of the project, typically ranging from a few hundred to a thousand dollars.
- Unforeseen Expenses: Unexpected issues, such as rotted wood under the stucco or necessary repairs to the underlying structure, can significantly increase the total cost. It’s wise to include a contingency buffer (10-20% of the estimated cost) in your budget to account for these possibilities.
Cost Comparison with Other Cladding Options
Vinyl siding is generally a cost-effective option compared to some other exterior cladding materials suitable for covering stucco. While the exact pricing varies by region and material choices, here’s a general comparison:
| Cladding Material | Approximate Cost per Square Foot (USD) | Notes |
|---|---|---|
| Vinyl Siding | $5 – $15 | Relatively inexpensive, low-maintenance |
| Fiber Cement Siding | $8 – $25 | Durable, fire-resistant, but more expensive |
| Brick Veneer | $15 – $40 | Very durable, a high-end aesthetic, but is significantly more expensive |
| Stone Veneer | $20 – $60+ | High-end aesthetic, durable, but very costly |
Note that these are rough estimates, and actual costs can vary considerably depending on factors like material quality, labor rates, and project complexity.
Cost Reduction Strategies
While quality shouldn’t be compromised, there are ways to potentially reduce costs without sacrificing longevity or appearance:
- Shop around for materials: Compare prices from different suppliers to find the best deals on vinyl siding and other necessary materials.
- Consider DIY if feasible: If you have experience with home improvement projects, you could potentially save on labor costs by handling some aspects of the installation yourself. However, ensure you have the necessary skills and tools to avoid costly mistakes.
- Choose a simpler siding style: More intricate siding designs often require more labor and materials, increasing the overall cost. A simpler style can reduce both material and labor expenses.
- Plan the project carefully: Thorough planning can help avoid costly mistakes and delays. A well-defined scope of work will help keep the project on track and within budget.
Maintenance and Longevity
Source: Squarespace-cdn.com
Vinyl siding, even when installed over stucco, requires regular maintenance to ensure its longevity and attractive appearance. Neglecting this can lead to premature deterioration and costly repairs. Proper care will keep your siding looking great and protect your home’s exterior for many years.
Proper cleaning and occasional repairs are key to maximizing the lifespan of your vinyl siding. Addressing issues promptly prevents small problems from escalating into larger, more expensive ones. Think of it like regular car maintenance – a little preventative care goes a long way.
Cleaning Vinyl Siding
Regular cleaning removes dirt, grime, and mildew buildup, which can dull the siding’s color and potentially damage the surface. A simple solution of mild detergent and water, applied with a soft-bristled brush or sponge, is usually sufficient. Rinse thoroughly with a garden hose to remove all traces of soap. For stubborn stains, a pressure washer can be effective, but use caution to avoid damaging the siding; maintain a safe distance and avoid direct, high-pressure contact for extended periods. Annual cleaning is recommended, but more frequent cleaning might be necessary in areas with heavy pollution or pollen.
Identifying and Repairing Damaged Panels
Inspect your siding regularly for signs of damage, such as cracks, dents, or loose panels. Cracks often appear as thin lines, while dents may be caused by impacts from objects like sports equipment or falling branches. Loose panels are usually caused by improper installation or expansion and contraction due to temperature changes. Minor cracks can sometimes be repaired with vinyl caulk designed for exterior use, while more significant damage usually requires replacing the affected panel. Replacing a damaged panel involves carefully removing the damaged section, ensuring proper alignment, and securing the new panel with appropriate fasteners. It’s always advisable to consult with a professional for significant repairs or if you are uncomfortable undertaking the work yourself.
Addressing Discoloration
Discoloration can be caused by several factors, including prolonged exposure to sunlight, mildew, or algae growth. Regular cleaning usually addresses mildew and algae. For discoloration caused by sun exposure, unfortunately, there’s no easy fix. This is a natural process that occurs over time, but choosing higher-quality, UV-resistant siding can help mitigate this issue.
Extending the Lifespan of Vinyl Siding
Several practices can extend the life of your vinyl siding. Avoid using abrasive cleaners or harsh chemicals, as these can scratch or damage the surface. Trim back overhanging branches that could scrape against the siding. Regularly inspect and repair any damage promptly. Consider installing gutter guards to prevent debris buildup and potential water damage. Proper ventilation around the house can also prevent moisture buildup, which can lead to problems such as mold and mildew growth. By following these simple maintenance tips, you can significantly increase the lifespan of your vinyl siding and protect your home’s exterior for many years to come.
Potential Challenges and Solutions
Source: cdpstucco.com
Installing vinyl siding over stucco presents unique challenges that require careful planning and execution. Ignoring these potential problems can lead to costly repairs down the line, compromising both the aesthetics and longevity of your project. Understanding these challenges and their solutions is crucial for a successful outcome.
Uneven Stucco Surfaces
Uneven stucco surfaces are a common issue. Significant variations in the stucco’s surface can create gaps between the siding and the wall, compromising the weatherproofing and overall appearance. These irregularities can range from minor imperfections to larger dips and bulges. To address this, thorough surface preparation is key. This involves carefully assessing the stucco’s condition, identifying any severely damaged areas, and potentially repairing or smoothing them using appropriate patching compounds. In cases of extreme unevenness, furring strips might be necessary to create a more consistent surface for the siding installation. The added cost of these preparations should be factored into the overall budget.
Moisture Problems
Moisture trapped behind the stucco can lead to significant problems. This trapped moisture can cause rot, mold growth, and damage to the underlying structure. Before installing vinyl siding, it’s essential to ensure the stucco is completely dry. This may involve waiting for periods of dry weather, using moisture meters to check for trapped water, and addressing any sources of water intrusion, such as leaking pipes or damaged flashing. If significant moisture is detected, it’s crucial to address the root cause before proceeding with the siding installation to avoid future issues. Ignoring moisture problems can lead to significant and expensive repairs later.
Building Codes and Permits
Compliance with local building codes is paramount. These codes often dictate specific requirements for exterior cladding, including vinyl siding installations over stucco. Failure to obtain the necessary permits or to meet the code’s stipulations can result in fines, delays, and even the need for costly rework. It’s crucial to contact your local building department early in the planning process to understand the specific requirements in your area. This includes understanding regulations regarding ventilation, fire safety, and the proper installation methods for vinyl siding over stucco. The permit application process may also involve submitting detailed plans of the project.
Hiring a Qualified Contractor
The expertise of a qualified contractor is invaluable. Installing vinyl siding over stucco is not a simple DIY project; it requires specialized knowledge and experience to overcome the unique challenges involved. A qualified contractor will have the necessary skills to properly assess the condition of the stucco, address any moisture problems, and ensure proper installation techniques are followed. They will also be familiar with local building codes and can handle the permit application process. Choosing a contractor with a proven track record and positive reviews can significantly reduce the risk of complications and ensure a successful outcome. Consider checking references and obtaining multiple quotes before making a decision. A poorly executed job can lead to significant costs in repairs and replacements.
Visual Examples

Source:Squarespacee-cdn.com
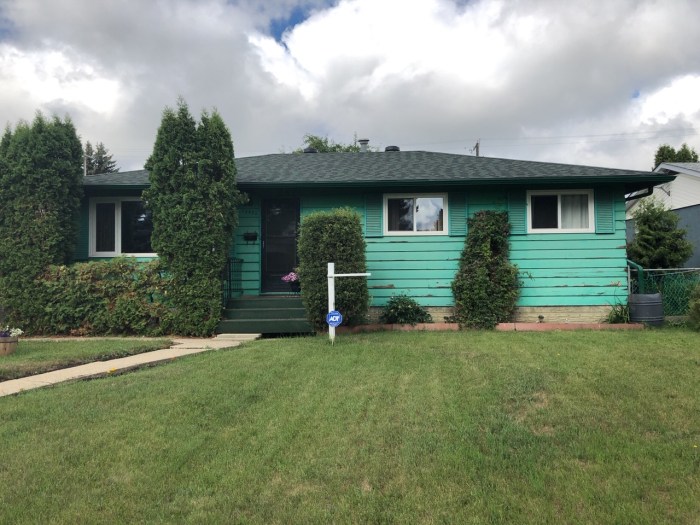
Seeing is believing, and when it comes to vinyl siding over stucco, visual examples can significantly impact your decision-making process. Before-and-after shots, showcasing the transformation, are particularly helpful. Let’s explore some examples to illustrate the potential aesthetic improvements.
Before-and-after visual representation of a house: Imagine a dated, beige stucco house with peeling paint and a generally tired appearance. The before image shows uneven stucco texture, some discoloration, and a lack of architectural detail. The after image reveals the same house clad in a deep charcoal gray vinyl siding with a classic clapboard style. The new siding creates clean lines, and a modern aesthetic, and dramatically improves the curb appeal. White trim accents the windows and doors, providing a crisp contrast against the dark siding. The overall effect is a sophisticated and updated look, significantly enhancing the home’s value and visual appeal.
Examples of Successful Vinyl Siding Installations, Vinyl siding over stucco
This section provides descriptions of several successful vinyl siding projects over stucco, highlighting the diversity of styles and color choices available. Visualizing these examples will aid in your design selection.
A ranch-style home originally covered in light peach stucco was transformed with a warm, earthy-toned vinyl siding in a horizontal lap style. The siding mimics the look of natural wood, creating a rustic charm. This example showcases how vinyl siding can complement existing landscaping and architectural elements.
Another example features a two-story colonial home. The previously dull, light-grey stucco was replaced with a creamy white vinyl siding with contrasting dark brown trim. The siding style chosen was a slightly more textured shake style, offering a touch of elegance and sophistication. This transformation showcases how vinyl siding can elevate a home’s overall appearance, providing a fresh and inviting look.
A final example demonstrates the use of vinyl siding in a more contemporary design. A modern stucco house with a minimalist aesthetic was updated with a sleek, grey vinyl siding in a vertical panel style. This creates a clean, modern feel that complements the house’s architecture. The use of a single, neutral color scheme emphasizes the simplicity and elegance of the design. These examples demonstrate the versatility of vinyl siding and its ability to adapt to various architectural styles and personal preferences.
Summary

Source: whatisvinyl.com
Revamping your home’s exterior with vinyl siding over stucco can be a rewarding experience. By carefully preparing the surface, selecting appropriate materials, and following proper installation techniques, you can achieve a stunning transformation. Remember, thorough planning, attention to detail, and potentially seeking professional help where needed, are key to a successful and long-lasting result. Your updated home will not only look great but also be better protected from the elements for years to come.