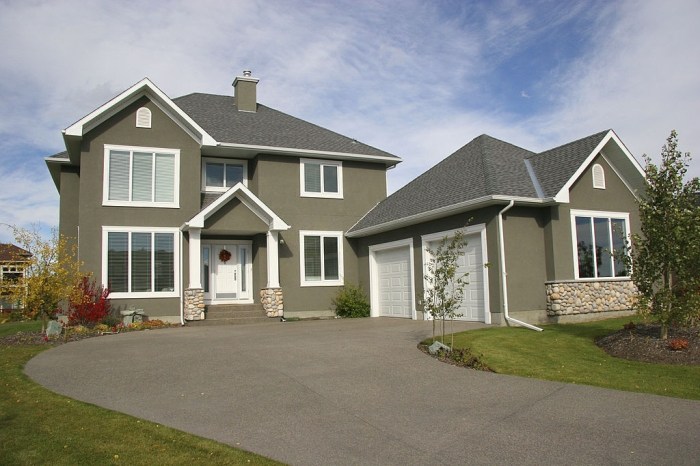
Cost to Install Siding Over Stucco
Cost to install siding over stucco? It’s a bigger project than you might think! This involves more than just slapping up some new siding; it requires careful preparation of your existing stucco, choosing the right materials, and finding a reliable contractor. We’ll break down the costs, the process, and everything you need to know to make this home improvement a success, from initial estimates to the final nail.
This guide covers everything from understanding the factors that influence the overall cost – materials, labor, location, and house size – to navigating the permitting process and troubleshooting potential problems. We’ll explore various siding options, like vinyl, fiber cement, and wood, and help you choose the best fit for your budget and aesthetic preferences. We’ll even offer tips on finding reputable contractors and getting the best value for your money.
Factors Influencing Cost
Source: plasteringsolutionsusa.com
Getting siding installed over your stucco can be a worthwhile investment, improving your home’s curb appeal and potentially boosting its value. However, the cost can vary significantly depending on several factors. Understanding these factors will help you budget effectively and make informed decisions. This section breaks down the key elements influencing the final price.
Siding Material Costs and Labor
The type of siding you choose dramatically impacts the overall cost. Material prices differ considerably, and the labor required for installation also varies depending on the material’s complexity. The table below provides a comparative overview.
| Factor | Material Type | Labor Costs | Additional Considerations |
|---|---|---|---|
| Material Cost (per sq ft) | Vinyl: $1-$5 | Fiber Cement: $2-$8 | Wood: $4-$15+ (depending on wood type and quality) |
| Labor Cost (per sq ft) | Vinyl: $2-$4 (relatively easy installation) | Fiber Cement: $4-$7 (more complex installation) | Wood: $6-$12+ (highly skilled labor often needed) |
| Longevity | Vinyl: 20-30 years | Fiber Cement: 50+ years | Wood: 20-50 years (highly dependent on maintenance and wood type) |
| Maintenance | Vinyl: Low | Fiber Cement: Low | Wood: Moderate to High (painting, sealing, potential repairs) |
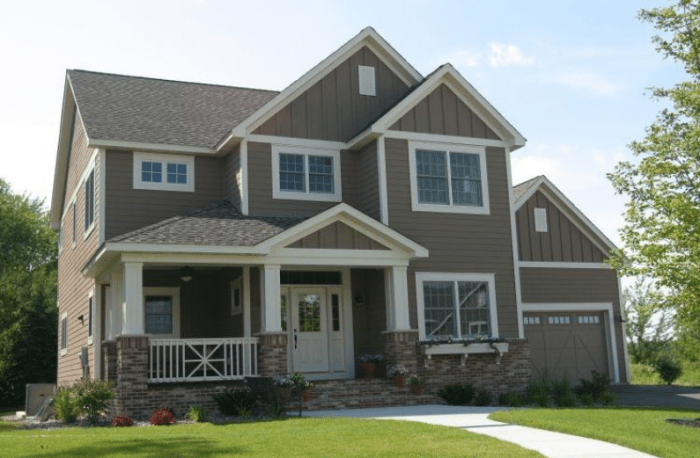
Siding Material Comparison
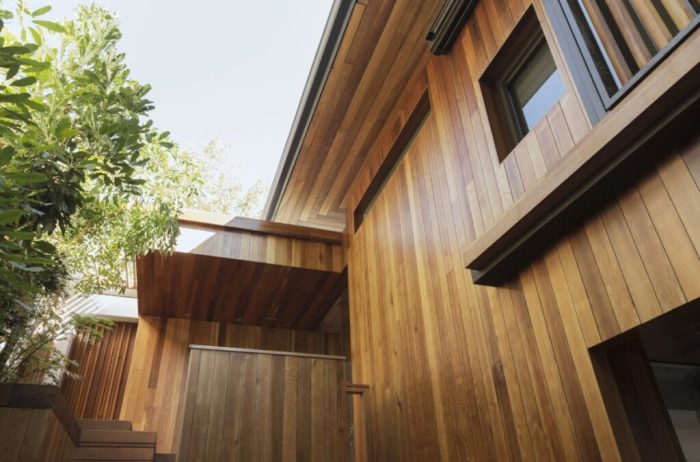
Choosing the right siding material is crucial. Here’s a breakdown of the common options:
The following list compares vinyl, fiber cement, and wood siding, considering cost, durability, and maintenance.
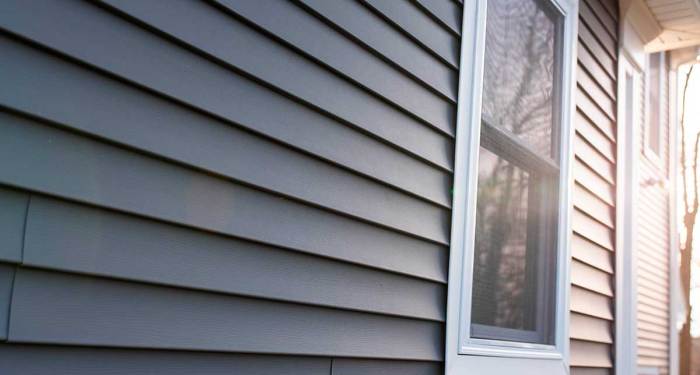
- Vinyl Siding: Generally the most affordable option, offering ease of installation and low maintenance. However, it’s less durable than other options and can be susceptible to damage from impact or extreme temperatures. Expect a lifespan of around 20-30 years.
- Fiber Cement Siding: More expensive than vinyl but significantly more durable and resistant to fire, insects, and rot. It offers a longer lifespan (50+ years) and requires minimal maintenance. Installation is more complex, hence the higher labor costs.
- Wood Siding: Offers a classic, aesthetically pleasing look, but comes with the highest price tag. Wood requires more maintenance, including regular painting and sealing, to prevent rot and insect damage. Its lifespan varies greatly depending on the type of wood and the level of maintenance provided.
Impact of House Size and Complexity
The size and complexity of your home significantly influence the total cost. Larger houses naturally require more materials and labor, leading to a higher overall expense. Intricate architectural details, such as multiple stories, dormers, or complex trim work, also add to the cost because they increase the labor time and material needs. For example, a single-story ranch will generally cost less than a two-story colonial with numerous gables and decorative features. A simple rectangular house will be cheaper to side than one with numerous angles and curves.
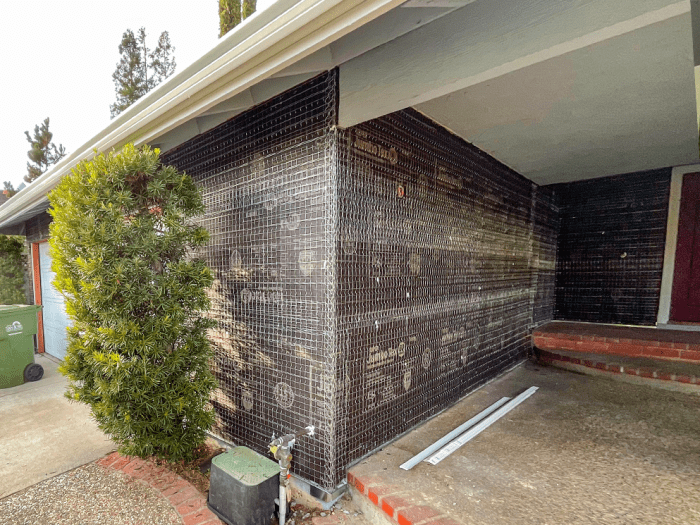
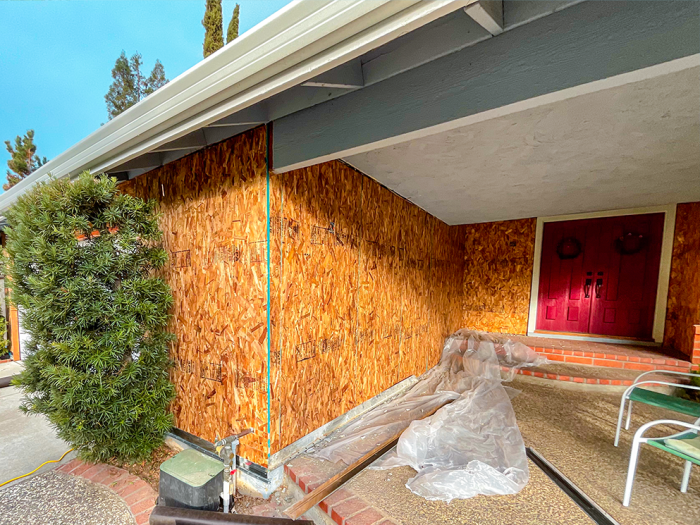
Preparation and Pre-Installation Steps

Source: remodelingcosts.org
Getting your stucco ready for new siding is crucial for a long-lasting, beautiful result. Proper preparation prevents future problems and ensures your siding installation looks great and performs as expected. Think of it as laying a solid foundation for a house – you wouldn’t skip prepping the ground, would you?
Preparing the stucco surface is a multi-step process that significantly impacts the outcome and the longevity of your siding. Neglecting this phase can lead to issues like siding failure, moisture damage, and an overall less-than-perfect aesthetic. Let’s dive into the specific steps involved.
Stucco Surface Preparation, Cost to install siding over stucco
Thorough preparation is essential for a successful siding installation over stucco. This involves several key steps to ensure a clean, sound, and stable surface for the new siding. Skipping even one step can compromise the entire project.
- Cleaning: Begin by thoroughly cleaning the stucco surface to remove dirt, loose paint, mildew, and other debris. Power washing is often the most effective method, using a low-pressure nozzle to avoid damaging the stucco. Pay close attention to areas where dirt and grime tend to accumulate, such as corners and crevices.
- Repairs: Inspect the stucco for cracks, holes, loose sections, or any other imperfections. Small cracks can be filled with patching compound, while larger repairs may require more extensive work, possibly involving replacing damaged sections of stucco. Ensure all repairs are completely dry before proceeding.
- Moisture Barrier Application: Applying a quality moisture barrier is critical, especially in climates with high humidity or rainfall. This barrier prevents moisture from penetrating behind the new siding, which can lead to mold, rot, and other structural problems. A breathable membrane is usually recommended to allow for moisture vapor transmission from within the wall cavity. This helps prevent trapped moisture.
Addressing Stucco Imperfections
Various methods exist for addressing stucco imperfections before siding installation. The choice of method depends on the severity and nature of the imperfection.
- Minor Cracks: Small cracks can often be repaired using a high-quality patching compound designed for stucco. Ensure the compound is properly mixed and applied according to the manufacturer’s instructions. Allow ample drying time before proceeding to the next step.
- Larger Cracks or Holes: More significant cracks or holes may require a more substantial repair. This might involve removing the damaged stucco, applying a bonding agent, and then filling the area with fresh stucco. It’s often best to consult a professional stucco repair specialist for extensive damage.
- Loose Stucco: Any loose or crumbling stucco must be removed completely before applying a new layer or installing siding. This ensures a secure and stable base for the new siding. Using a wire brush or other appropriate tool, carefully remove all loose material.
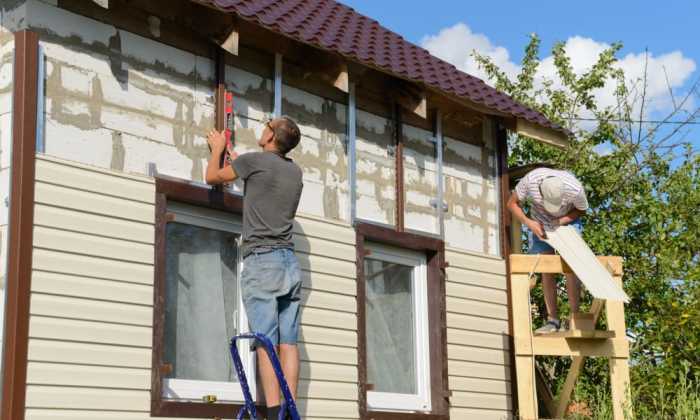
Installation Process and Techniques

Source: estimatorflorida.com
Installing siding over stucco requires careful planning and execution to ensure a long-lasting, aesthetically pleasing result. This process involves several key steps, from preparing the stucco surface to securing the new siding. Understanding these steps and employing the right techniques is crucial for a successful installation.
Step-by-Step Siding Installation Over Stucco
The following table illustrates the typical steps involved in installing siding over stucco, along with the necessary materials and tools. Remember to always consult local building codes and manufacturer’s instructions.
| Step | Materials | Tools |
|---|---|---|
| Surface Preparation: Clean and repair any cracks, holes, or loose stucco. Prime the surface for better adhesion. | Stucco patching compound, primer, wire brush, scraper | Putty knife, scraper, paint roller, brush |
| Water Management: Install flashing and water barriers to prevent moisture intrusion. This is especially important around windows and doors. | Flashing tape, waterproof membrane, sealant | Utility knife, measuring tape, caulking gun |
| Framing and Furring Strips (if needed): Install furring strips to create a space for insulation and to provide a level surface for the siding. This is often necessary to account for uneven stucco surfaces. | Furring strips (typically wood or metal), screws, insulation (optional) | Drill, level, measuring tape, saw |
| Siding Installation: Begin installing siding at a corner or edge, following the manufacturer’s instructions for overlapping and fastening. Maintain consistent spacing and alignment. | Siding panels, nails or screws, starter strips (if needed) | Nail gun or drill, level, measuring tape, saw |
| Finishing: Install trim pieces, corner boards, and other accessories as needed. Caulk all seams and joints to prevent water leakage. | Trim pieces, caulk, sealant | Caulking gun, measuring tape, saw |
Comparison of Siding Installation Methods
Different siding materials require slightly different installation techniques. For instance, vinyl siding is typically nailed directly to the furring strips or sheathing, while fiber cement siding might require specialized fasteners and more precise measurements due to its weight and rigidity. Wood siding often necessitates more intricate cuts and joinery. Metal siding, frequently used in commercial settings, often involves a system of interlocking panels and specialized clips. Each type demands specific attention to detail for optimal performance.
Best Practices for Professional Siding Installation
Several best practices ensure a durable and professional-looking siding installation. These include meticulous surface preparation to eliminate any potential problems later, using high-quality materials appropriate for the climate and building type, and following the manufacturer’s instructions precisely. Accurate measurements and consistent spacing between siding panels are essential for a neat and professional finish. Furthermore, paying close attention to water management and using appropriate sealants will greatly extend the lifespan of the siding. Finally, hiring experienced installers can prevent costly mistakes and ensure a superior outcome.
Material Costs and Sourcing: Cost To Install Siding Over Stucco

Source: ebyexteriors.com
Choosing the right siding material significantly impacts the overall cost of your project. Understanding the price ranges and sourcing strategies for common siding options is crucial for budgeting and ensuring a quality installation. This section details the costs associated with different siding materials and guides on finding reliable suppliers.
Siding Material Price Ranges
The cost of siding varies considerably depending on the material, quality, and features. The following table provides estimated price ranges per square foot, installed, for common siding materials in the US. Remember that these are estimates, and actual costs can fluctuate based on location, labor rates, and project specifics. Always get multiple quotes from reputable contractors.
| Siding Material | Low-End Price Range ($/sq ft) | Mid-Range Price Range ($/sq ft) | High-End Price Range ($/sq ft) |
|---|---|---|---|
| Vinyl Siding | $3 – $5 | $5 – $8 | $8 – $12 |
| Fiber Cement Siding | $8 – $12 | $12 – $18 | $18 – $25+ |
| Wood Siding (Cedar, etc.) | $10 – $15 | $15 – $25 | $25+ |
Strategies for Cost-Effective Sourcing
Finding cost-effective siding materials without compromising quality requires careful planning and research. Consider purchasing materials during off-season sales or taking advantage of manufacturer rebates. Comparing prices from multiple suppliers is essential. Don’t hesitate to negotiate prices, especially for larger projects. Exploring options like reclaimed or recycled materials can also offer significant cost savings, though careful inspection for quality is crucial. For example, purchasing slightly less expensive vinyl siding in a popular color might save a considerable amount without noticeably impacting the overall aesthetic.
Sourcing Materials and Choosing Suppliers
The process of sourcing materials involves identifying reputable suppliers and comparing their offerings. Factors to consider include the supplier’s reputation, lead times, warranty offerings, and delivery options. Checking online reviews and seeking recommendations from contractors can help ensure you’re working with a reliable supplier. Confirm that the supplier can provide the necessary documentation, such as certificates of origin and quality certifications, especially for materials like fiber cement siding which have specific requirements. Consider the supplier’s proximity to your project site to minimize transportation costs and potential delays. A well-established local lumberyard might offer personalized service and competitive pricing, while larger national distributors might offer economies of scale for bulk orders.
Labor Costs and Contractor Selection
Source: mayaconstruction1.com
Getting new siding over your stucco is a big project, and a significant portion of the overall cost will be labor. Understanding labor costs and choosing the right contractor is crucial for a successful and budget-friendly renovation. This section will help you navigate these important aspects of your project.
Labor costs for siding installation over stucco are highly variable. Several factors influence the final price, making it impossible to give one definitive number. However, we can provide a general range and highlight the key variables.
Typical Labor Cost Ranges
The cost of labor for siding installation over stucco typically ranges from $3 to $8 per square foot, depending on several factors. Location plays a significant role; areas with higher labor costs, such as major metropolitan areas on the coasts, will naturally command higher rates. Project size also matters; larger projects often benefit from economies of scale, potentially lowering the per-square-foot cost. The experience and reputation of the contractor are also key; highly skilled and experienced contractors often charge more, reflecting their expertise and the quality of their work. For example, a smaller project in a rural area might cost $3-$5 per square foot, while a large, complex project in a major city could easily reach $7-$8 or even more. It’s always best to get multiple quotes to compare pricing accurately.
Contractor Selection Checklist
Choosing the right contractor is as important as choosing the right siding material. A thorough selection process will protect your investment and ensure a smooth installation.
Before you begin contacting contractors, gather information about your project, including detailed measurements and desired materials. This will allow for more accurate and comparable quotes.
- Check Licenses and Insurance: Verify that the contractor holds all necessary licenses and insurance, including worker’s compensation and liability insurance. This protects you from potential legal and financial liabilities.
- Request References: Ask for references from previous clients and contact them to inquire about their experiences. Inquire about timelines, communication, quality of work, and responsiveness to any issues.
- Review Online Reviews and Ratings: Check online platforms like Yelp, Google Reviews, and Angie’s List for reviews and ratings of potential contractors. Look for consistent positive feedback and address any negative reviews.
- Examine Their Portfolio: Ask to see photos or videos of their previous siding installation projects, particularly those over stucco. This will give you a visual idea of their work quality and attention to detail.
- Clarify Payment Terms: Understand their payment schedule and methods. Avoid contractors who request full payment upfront. A staggered payment plan, tied to project milestones, is generally recommended.
- Get Everything in Writing: All agreements, including the scope of work, payment terms, and timelines, should be articulated in a written contract. Review this contract carefully before signing.
The Importance of Multiple Quotes
Never settle for a single quote. Obtaining multiple quotes from different contractors is crucial for a fair and informed decision. Comparing quotes allows you to evaluate pricing, services offered, and contractor qualifications. This competitive process can often lead to significant savings and a better overall experience. Remember to ensure that all quotes are based on the same scope of work to ensure an accurate comparison. Don’t just focus on the lowest price; consider the overall value and reputation of the contractor.
Permits and Legal Considerations

Source: westwoodsiding.ca
Installing siding over stucco is a significant home improvement project, and navigating the legal landscape is crucial to avoid costly fines and potential legal disputes. Ignoring permit requirements can lead to delays, project shutdowns, and even the need for costly remediation. Understanding the permit process and associated legal implications is vital for a smooth and compliant project.
Securing the necessary permits demonstrates your commitment to following building codes and regulations, protecting both your investment and the safety of your property. Failing to do so can expose you to significant liability.
Permit Requirements Vary by Location
The specific permits required for siding installation over stucco vary considerably depending on your location. These requirements are determined at the local level, usually by your city or county government. Factors influencing permit needs include the type of siding being installed, the size of the project, and local building codes. For example, a small project in a rural area might require only a simple building permit, while a larger project in a city with strict building codes could necessitate multiple permits, potentially including those related to structural changes or alterations to the existing stucco. It’s always advisable to contact your local building department early in the planning process to determine the exact permits required for your specific project. They can provide a detailed list of necessary paperwork and application fees.
Legal Implications of Unpermitted Work
Undertaking a siding installation project without the necessary permits carries several legal risks. These include hefty fines, stop-work orders forcing you to halt the project until permits are obtained, and even legal action by your local authorities. In some cases, unpermitted work might necessitate demolition and reconstruction to meet building codes, resulting in significant added costs and delays. Furthermore, if a problem arises due to unpermitted work (e.g., structural damage or water leakage), insurance companies might refuse to cover the associated expenses. This can leave you financially responsible for all repairs and remediation. Unpermitted work can also impact the future sale of your property, as a potential buyer may be unwilling to purchase a home with unresolved building code violations.
Steps Involved in Obtaining Permits
The process for obtaining building permits generally involves these steps:
- Initial Consultation: Contact your local building department to discuss your project and determine the specific permits needed. Gather all necessary information about your project, including detailed plans, specifications, and material selections.
- Application Submission: Complete the permit application forms accurately and thoroughly. Include all required documentation, such as project plans, site surveys, and contractor qualifications (if applicable).
- Review and Approval: The building department will review your application to ensure it meets all local codes and regulations. This review process can take several days or even weeks, depending on the complexity of the project and the workload of the department. You may be required to make revisions to your application based on their review.
- Permit Issuance: Once your application is approved, the building department will issue the necessary permits. These permits will typically specify the scope of work allowed and any conditions that must be met during the project.
- Inspections: Throughout the project, building inspectors will likely conduct inspections at various stages to ensure compliance with building codes. These inspections are mandatory and scheduling them in advance is crucial for maintaining project timelines.
Remember, proactive communication with your local building department is essential throughout the entire permit process. Don’t hesitate to clarify any questions or concerns you may have. It’s better to ask for clarification than to proceed without fully understanding the requirements.
Potential Issues and Troubleshooting

Source: ebyexteriors.com
Installing siding over stucco presents unique challenges. Understanding potential problems and how to address them is crucial for a successful and long-lasting project. Ignoring these issues can lead to costly repairs down the line, impacting both the aesthetics and structural integrity of your home. This section articulates common problems, their solutions, and the potential long-term consequences of improper installation.
Common Problems During Siding Installation Over Stucco
Addressing potential issues proactively is key to a smooth siding installation. Failing to do so can result in significant rework and added expense. Here are some common problems encountered and their solutions:
- Uneven Stucco Surface: Stucco is rarely perfectly smooth. Significant variations in surface level can lead to uneven siding installation and an unattractive finished product. Solution: Before installing siding, address unevenness by applying a skim coat of stucco or using shims to level the surface. This ensures a consistent plane for the siding to adhere to.
- Moisture Problems: Moisture trapped behind the siding can cause rot, mold, and structural damage. Solution: Ensure proper ventilation behind the siding. Use a breathable house and install flashing around windows and doors to prevent water penetration. Addressing any existing moisture issues in the stucco before installation is also critical.
- Improper Flashing: Incorrectly installed flashing around windows, doors, and other penetrations allows water to enter the wall system. Solution: Use high-quality flashing materials and ensure they are properly installed, overlapping appropriately, and sealed to prevent water leakage. This is vital to protect the underlying structure.
- Nail Pops: Nails used to fasten the siding can pop out over time due to the expansion and contraction of the materials. Solution: Use appropriate-length nails and fasteners designed for the specific siding material. Pre-drilling pilot holes can also help minimize nail pops. Regular inspection and repair are necessary.
- Gaps and Cracks: Gaps between siding panels or cracks in the stucco can compromise the building envelope, leading to air leaks and moisture intrusion. Solution: Ensure proper alignment and sealing of siding panels. Use appropriate caulking or sealant to fill any cracks or gaps in the stucco before siding installation. This creates a weathertight seal.
Potential Long-Term Issues from Improper Installation
Neglecting proper installation techniques can lead to significant problems down the road, impacting the value and lifespan of your home.
- Water Damage: This is arguably the most serious consequence. Water intrusion can cause rot in wood framing, mold growth, and damage to insulation, leading to costly repairs and potential health hazards. Examples include rotted window sills, damaged wall sheathing, and the need for extensive repairs to address water damage.
- Reduced Energy Efficiency: Air leaks caused by gaps and cracks in the siding and stucco system can lead to increased energy consumption and higher heating and cooling bills. This can be a significant ongoing cost for homeowners.
- Aesthetic Issues: Uneven siding, gaps, and poor workmanship can significantly detract from the curb appeal of your home, reducing its value. For example, noticeable gaps between siding panels can create an untidy and unprofessional look.
- Structural Problems: Severe water damage can compromise the structural integrity of your home, leading to costly repairs or even requiring structural reinforcement. This could manifest as weakened walls or foundation issues.
Troubleshooting Guide for Common Siding Installation Problems
A systematic approach to troubleshooting is essential for resolving issues effectively.
| Problem | Cause | Solution |
|---|---|---|
| Uneven Siding | Uneven stucco surface, improper installation | Shim uneven areas, carefully align the siding panel, and use level |
| Nail Pops | Improper nailing technique, expansion, and contraction | Use appropriate nails and fasteners, pre-drill pilot holes, countersink nails |
| Water Leaks | Improper flashing, gaps in siding, cracked stucco | Inspect and repair flashing, seal gaps with caulking, repair cracked stucco. |
| Gaps Between Siding | Improper cutting, inaccurate measurements | Recut siding panels to ensure proper fit, and use spacers for consistent gaps. |
| Mold Growth | Moisture intrusion, lack of ventilation | Address moisture issues, ensure proper ventilation, clean and treat mold |
Visual Representation of Installation Stages
Source: ebyexteriors.com
Imagine the transformation of a stucco-clad house into a beautifully sided home. This visual journey breaks down the siding installation process, highlighting key stages and their visual impact. We’ll focus on the visual changes and the techniques used at each step.
Initial Stucco Assessment and Preparation
The first stage involves a thorough inspection of the stucco. Picture a team carefully examining the surface for cracks, loose areas, and any signs of water damage. You’d see them marking areas needing repair with chalk or paint, a visual checklist for the next phase. This assessment is crucial; a solid foundation ensures the siding’s longevity. Next, you’d see the preparation: damaged stucco is repaired and smoothed, resulting in a uniform surface ready for the siding installation. This prepared surface is visibly even and clean, providing a strong base for the new siding.
Installation of Flashing and Water Barriers
Now, visualize the installation of flashing around windows and doors. Think of it as a protective armor, meticulously fitted to prevent water penetration. The flashing, usually metallic and shiny, is carefully tucked into the corners and edges, creating a visible barrier against moisture. You would see waterproof membranes—perhaps a dark gray or black material—being neatly applied over the stucco, creating a smooth, continuous layer that prevents moisture from seeping behind the siding. This stage is less visually striking but is essential for long-term protection.
Siding Installation: Starting the First Course
The installation of the first course of siding is visually impactful. Imagine perfectly aligned siding panels, usually starting at the bottom of the house, neatly fastened to the underlying structure. The visual effect is that of a straight, level line across the building’s foundation. You’ll notice the precise cuts and measurements, showcasing the installer’s skill. The color and texture of the chosen siding will begin to dramatically transform the appearance of the house.
Siding Installation Around Windows and Doors
This stage requires precision. Imagine the installers carefully measuring and cutting the siding to fit snugly around windows and doors. You’d see them using specialized tools to create precise cuts and ensure a clean, finished look. The visual result is a seamless transition between the siding and the window/door frames. Proper installation prevents gaps or overlaps, maintaining a clean and professional appearance. The finished product shows the siding neatly integrated with the window and door frames, creating a professional finish.
Final Inspection and Clean-Up
The final visual is one of transformation. The house is now clad in new siding, a significant change from its previous stucco exterior. The siding should be neatly aligned, showing no gaps or inconsistencies. The installers will have cleaned up all debris, leaving the area around the house tidy and presentable. The finished project displays a clean, modern aesthetic and demonstrates the successful completion of the project. This final stage visually showcases the successful transformation.
Ultimate Conclusion
Source: remodelingcosts.org
Ultimately, the cost to install siding over stucco is a variable depending on many factors. However, with careful planning, thorough preparation, and the right contractor, you can transform your home’s exterior and increase its value. Remember to factor in all the costs – materials, labor, permits, and potential unforeseen issues – to get an accurate estimate. By following the steps Artikel in this guide, you’ll be well-equipped to navigate this project confidently and achieve a beautiful, long-lasting result.