Putting Siding Over Stucco A Homeowners Guide
Putting siding over stucco is a popular home improvement project, offering a fresh look and potential cost savings compared to complete stucco removal. This guide walks you through the process, from initial assessment and material selection to installation techniques and long-term maintenance. We’ll explore the pros and cons of various siding options and address common challenges, ensuring you have the knowledge to tackle this project successfully, whether you’re a DIY enthusiast or working with a contractor.
Whether you’re aiming for a modern update or a more classic aesthetic, covering your stucco with siding offers a multitude of possibilities. We’ll cover everything from prepping your existing stucco for a smooth installation to selecting the perfect siding material to complement your home’s style and enhance its curb appeal. Get ready to transform your home’s exterior!
Introduction to Siding Over Stucco

Source: crownremodelingllc.com
Putting siding over stucco is a popular home renovation choice for a variety of reasons. Homeowners often opt for this method to update their home’s exterior aesthetic, improve energy efficiency, or repair damaged stucco without the extensive cost and disruption of complete stucco removal. This approach offers a quicker and potentially less expensive alternative to full stucco replacement, although it’s crucial to weigh the pros and cons carefully before making a decision.
Choosing to install siding over existing stucco instead of removing it first presents a trade-off between cost and potential long-term issues. While it is generally faster and cheaper upfront, leaving the stucco in place could potentially lead to moisture problems if the stucco isn’t properly prepared. Removing the stucco ensures a completely clean and dry surface for the new siding, minimizing the risk of future damage caused by trapped moisture. However, this approach often involves significantly higher labor and material costs, and can be quite disruptive.
Reasons for Choosing Siding Over Stucco
Homeowners often choose to install siding over stucco to achieve a more modern or updated look. Stucco, while durable, can sometimes appear dated. Siding provides a wide array of styles, colors, and textures, allowing for significant customization. Another compelling reason is to address issues with the existing stucco, such as cracks, discoloration, or damage from weather exposure. Siding can effectively cover these imperfections, providing a fresh, uniform finish without the need for extensive repairs. Finally, siding can offer improved energy efficiency compared to older stucco, leading to lower utility bills over time.
Advantages and Disadvantages of Siding Over Stucco
Installing siding over stucco offers several advantages. It’s typically a faster and less expensive project than removing the stucco first. It also provides a quick solution to cover imperfections in the existing stucco, avoiding the extensive repair work that might otherwise be needed. However, the process has disadvantages. The added thickness of the siding can slightly reduce the interior space of the home, and improper installation can lead to moisture buildup and potential structural problems. Additionally, the weight of the added siding might not be suitable for all stucco structures, requiring a professional assessment to ensure structural integrity.
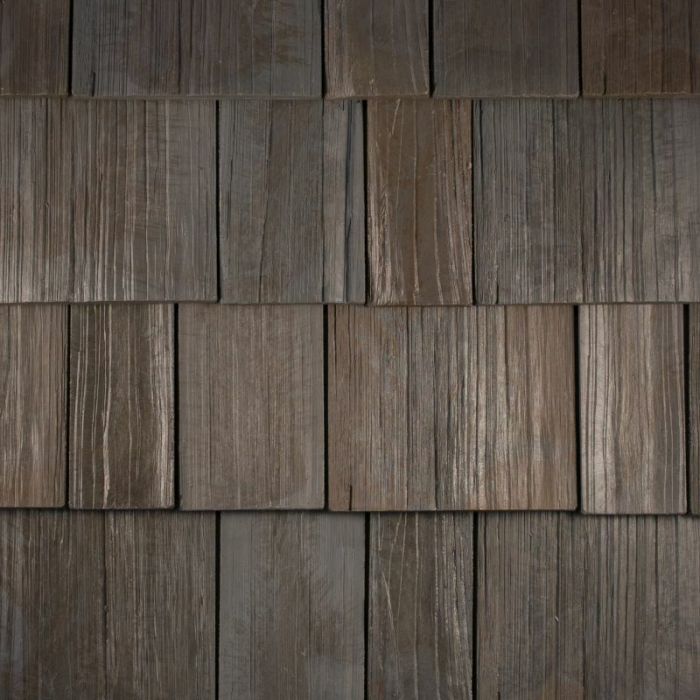
Suitable Siding Materials for Installation Over Stucco
Several siding materials are suitable for installation over stucco. Vinyl siding is a popular choice due to its affordability, low maintenance, and wide variety of styles. Fiber cement siding offers greater durability and fire resistance but is typically more expensive. Wood siding provides a classic and aesthetically pleasing look, but requires more maintenance to prevent rot and insect damage. Metal siding, such as aluminum or steel, is highly durable and resistant to fire and insects but can be more expensive and prone to dents. The best choice will depend on the homeowner’s budget, aesthetic preferences, and specific climate conditions.
Preparation and Assessment

Source: amipdx.com
Getting your stucco ready for siding is crucial for a long-lasting, beautiful finish. A thorough inspection and any necessary repairs will prevent problems down the line and save you headaches later. Think of this stage as laying a solid foundation for your new siding. Ignoring problems now could lead to bigger, more expensive issues after the siding is installed.
Proper preparation involves a careful assessment of your stucco’s condition, identifying areas needing attention, and making the necessary repairs. This process ensures the new siding adheres properly and provides the best possible protection for your home. This step is often overlooked, but it’s the key to a successful siding project.
Stucco Inspection and Damage Assessment, Putting siding over stucco
Begin by systematically inspecting the entire stucco surface. Look for cracks, loose or crumbling areas, signs of water damage (like stains or efflorescence – a white, powdery deposit), and any areas where the stucco is separating from the underlying substrate. Pay close attention to areas around windows, doors, and corners, as these are often more vulnerable to damage. Document your findings with photos or detailed notes, noting the location and severity of each issue. A thorough assessment will help you determine the scope of the necessary repairs and the materials you’ll need.
Tools and Materials for Stucco Preparation
Before you begin repairs, gather the necessary tools and materials. Having everything on hand will streamline the process and prevent delays. This will make the repair work more efficient and ensure you have what you need when you need it.
- Wire brush: To remove loose stucco and debris.
- Putty knife: For applying patching compound and removing loose stucco.
- Hammer and chisel: For removing severely damaged sections of stucco.
- Caulk gun: For applying sealant to cracks and gaps.
- Stucco patching compound: Choose a compound compatible with your existing stucco.
- Exterior-grade sealant: A high-quality sealant is essential for waterproofing.
- Primer: To prepare the repaired areas for painting or siding installation.
- Safety glasses and dust mask: Always prioritize safety.
- Ladder (if necessary): For accessing higher areas.
Addressing Common Stucco Issues
Cracks, loose areas, and water damage are common stucco problems. Knowing how to address these effectively is vital for a successful siding installation. Ignoring these issues can lead to problems such as moisture penetration, structural damage, and even mold growth.
Crack Repair
Small cracks can often be repaired with a high-quality exterior-grade caulk. For larger cracks, you may need to remove the damaged stucco around the crack, clean the area thoroughly, and apply a stucco patching compound. Ensure the compound is properly feathered into the surrounding stucco for a seamless repair.
Loose Stucco Repair
Loose or crumbling stucco needs to be removed completely down to the substrate (usually lath or concrete). Use a wire brush and putty knife to remove loose material. Then, clean the area thoroughly before applying a patching compound. Apply the compound in thin layers, allowing each layer to dry before applying the next.
Water Damage Repair
Water damage often requires more extensive repairs. If the water damage is severe, you may need to consult a professional. Addressing water damage involves locating the source of the leak and repairing it. Once the source is addressed, remove any damaged stucco, clean the area, and apply a waterproof sealant before patching. This will prevent future water damage and protect your home.
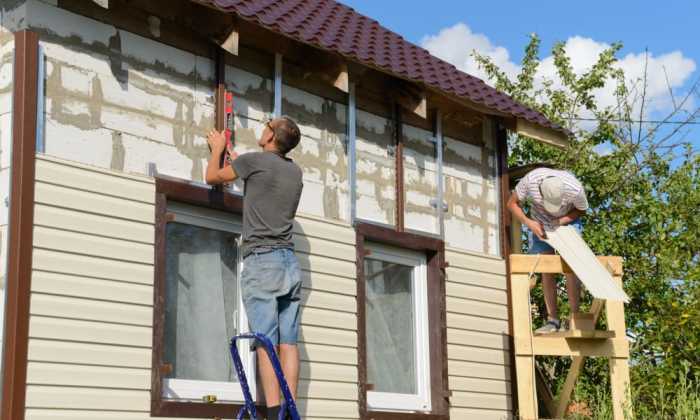
Installation Methods
Source: amazonaws.com
Installing siding over stucco requires careful consideration of the chosen method. The two primary approaches are direct application and using furring strips. Each offers advantages and disadvantages concerning cost, time commitment, and material needs. Choosing the right method depends heavily on the condition of your stucco, the type of siding you’re using, and your budget.
Direct application involves attaching the siding directly to the stucco surface. This method is generally faster and less expensive but requires a very smooth and sound stucco surface. Any imperfections will show through the new siding. Using furring strips, on the other hand, creates a space between the stucco and the siding, allowing for better ventilation and hiding imperfections in the underlying stucco. This method is more labor-intensive and expensive but provides a more durable and aesthetically pleasing result, especially with older or damaged stucco.
Direct Application vs. Furring Strips
The following table compares the two main methods for installing siding over stucco. Keep in mind that these are estimates and can vary based on factors like the size of the project, the type of siding used, and labor costs in your area.
| Method | Cost | Time | Material Requirements |
|---|---|---|---|
| Direct Application | Lower (potentially $3-$5 per square foot, excluding siding) | Faster (potentially 1-2 days for a small area) | Siding, adhesive, sealant, fasteners (if needed) |
| Furring Strips | Higher (potentially $5-$8 per square foot, excluding siding) | Slower (potentially 3-5 days for a small area) | Siding, furring strips (wood or metal), fasteners, vapor barrier (optional), sealant |
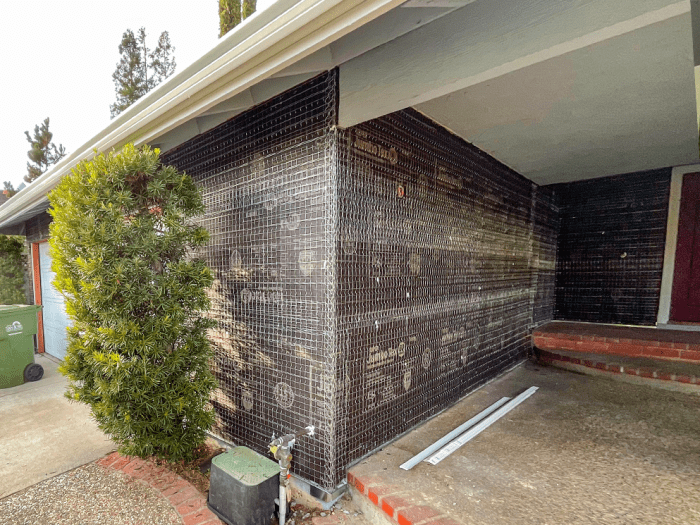
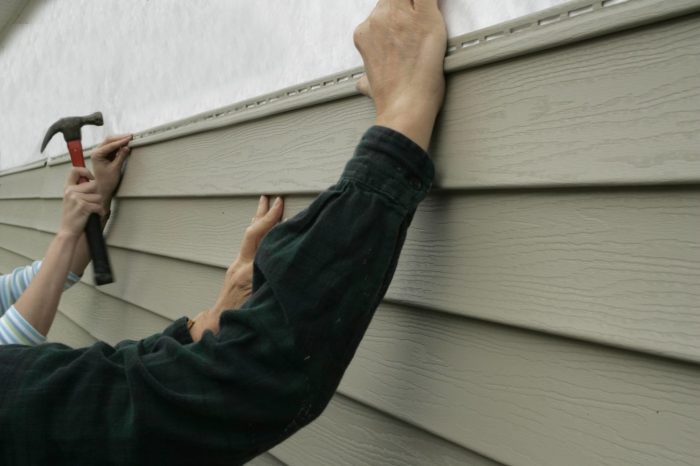
Installing Siding Over Stucco Using Furring Strips
Installing siding over stucco with furring strips is a multi-step process that ensures a long-lasting and visually appealing result. Proper preparation and execution are crucial for success. This method is particularly beneficial when dealing with uneven or damaged stucco.
Step 1: Stucco Assessment and Preparation Thoroughly inspect the stucco for cracks, loose areas, and any signs of water damage. Repair any significant problems before proceeding. Clean the stucco surface to remove loose debris, dirt, and mildew. This ensures proper adhesion of the furring strips.
Step 2: Furring Strip Installation Install horizontal furring strips spaced appropriately for your siding type (usually 16 inches in the center). Use corrosion-resistant screws or nails to secure the strips to the stucco. Ensure the strips are level and plumb. For added insulation and moisture control, consider installing a vapor barrier between the stucco and the furring strips.
Step 3: Siding Installation Follow the manufacturer’s instructions for installing your chosen siding. Generally, this involves starting at the bottom and working your way up, overlapping each piece according to the siding’s specifications. Use appropriate fasteners to secure the siding to the furring strips.
Step 4: Finishing Touches Caulk around windows, doors, and other openings. Add trim and flashing as needed to protect against water damage. Finally, inspect your work to ensure all pieces are properly installed and sealed.
Siding Material Selection and Considerations: Putting Siding Over Stucco

Source: hynesconstruction.com
Choosing the right siding material is crucial when covering stucco. The best option depends on your budget, aesthetic preferences, and the specific needs of your home. Consider factors like durability, maintenance requirements, and the overall look you want to achieve. Let’s explore some popular choices.
Different siding materials offer varying levels of durability, maintenance needs, and aesthetic appeal. Each has its own set of advantages and disadvantages when applied over stucco.
Vinyl Siding
Vinyl siding is a popular and budget-friendly option. Its lightweight nature makes installation relatively easy, and it’s available in a wide range of colors and styles. However, it can be susceptible to damage from strong impacts and extreme temperatures, and its lifespan is generally shorter than other materials.
- Pros: Affordable, easy to install, low maintenance, wide variety of colors and styles.
- Cons: Can be damaged easily, is less durable than other options, may fade over time, not as aesthetically pleasing as some higher-end materials.
Fiber Cement Siding
Fiber cement siding offers excellent durability and resistance to fire, insects, and rot. It’s a more expensive option than vinyl but boasts a much longer lifespan. Its heavier weight requires more robust installation techniques. It mimics the look of wood without the maintenance.
- Pros: Durable, long-lasting, fire-resistant, insect and rot-resistant, low maintenance.
- Cons: More expensive than vinyl, heavier and more difficult to install, can be brittle and prone to cracking if mishandled.
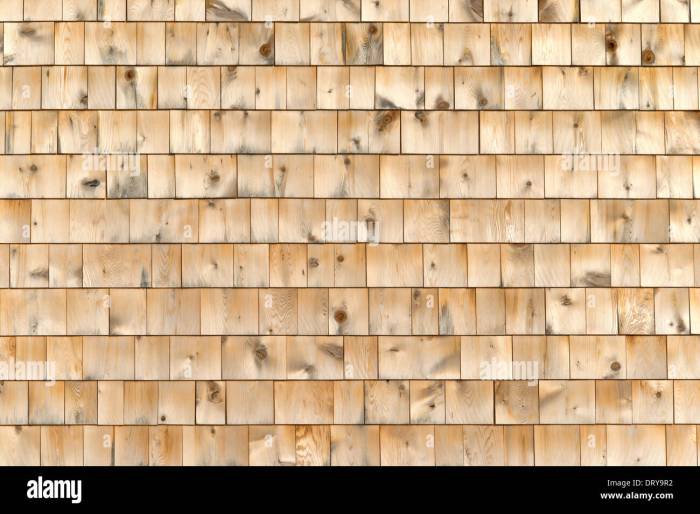
Wood Siding
Wood siding provides a classic and aesthetically pleasing look. However, it requires significant ongoing maintenance to prevent rot, insect infestation, and damage from the elements. Regular painting or staining is necessary, and it’s more expensive than vinyl. Wood siding can also be susceptible to moisture damage if not properly installed and maintained, especially over stucco which may retain moisture.
- Pros: Classic look, natural beauty, can be customized.
- Cons: High maintenance, susceptible to rot, insect damage, and moisture, expensive.
Siding Color and Style Selection
Choosing the right color and style is key to complementing your home’s existing architecture and enhancing its curb appeal. Consider the existing stucco color, the architectural style of your house (e.g., Victorian, Ranch, Craftsman), and the surrounding landscape. Harmonizing colors and styles will create a cohesive and visually appealing exterior.
For example, a home with traditional stucco might be well-suited to a classic clapboard style siding in a neutral color that complements the existing stucco. A more modern stucco home might pair better with sleek, horizontal siding in a bold color. Consider using a color wheel to identify complementary or analogous color schemes.
Addressing Potential Challenges
Source: avalonhomeinspections.net
Siding over stucco presents unique challenges due to the inherent differences in the materials and their respective properties. Uneven stucco surfaces, moisture penetration, and the need for proper fastening are key concerns that require careful planning and execution to avoid costly mistakes and ensure a long-lasting, aesthetically pleasing result. Understanding these potential problems and employing effective solutions is crucial for a successful project.
Addressing these challenges proactively minimizes the risk of project delays and rework. By anticipating potential issues and having strategies in place, you can maintain a smooth workflow and achieve a superior final product. This section details common problems, their solutions, and preventative measures.
Uneven Stucco Surfaces
Uneven stucco surfaces are a common issue. Variations in the stucco’s thickness and texture can lead to gaps between the new siding and the wall, compromising the overall appearance and potentially affecting insulation and weather resistance. To address this, shims are essential. These thin, wedge-shaped pieces of wood or plastic are placed between the siding and the stucco to create a level surface for the siding to rest on. Careful measurement and placement of shims are critical to ensure a consistent gap and a flush finish. For example, a particularly bumpy section of stucco might require several shims of varying thicknesses to create a level plane. Failure to adequately shim can result in a wavy or uneven siding installation.
Moisture Management
Moisture is a significant concern when siding over stucco. Stucco can retain moisture, and if not properly addressed, this moisture can lead to mold, mildew, and rot behind the new siding. A high-quality moisture barrier is essential to prevent this. This barrier, typically a polyethylene membrane or similar material, should be installed over the stucco before the siding is applied. This creates a breathable layer that allows moisture vapor to escape while preventing liquid water from penetrating. For instance, a situation where the stucco shows signs of previous water damage necessitates a more robust moisture barrier and potentially the use of a vapor retarder to further mitigate future moisture issues. Ignoring this step could lead to significant damage down the line.
Proper Fastening and Anchoring
Securing the siding properly to the stucco is critical. Stucco, being less rigid than traditional wood framing, requires careful consideration of fastener type and placement. Using the correct fasteners, such as corrosion-resistant screws designed for stucco, is crucial. Additionally, using a sufficient number of fasteners to ensure a secure hold, while avoiding over-fastening which can crack the stucco, is vital. For example, using standard wood screws instead of stucco screws may lead to the screws pulling out over time, resulting in loose or falling siding. Careful consideration of fastener placement and type is vital to ensure long-term stability and prevent siding failure.
Preventative Measures
Before beginning the installation, a thorough assessment of the stucco is crucial. This includes checking for cracks, loose areas, and any signs of previous water damage. Repairing any damaged areas before proceeding is essential. Additionally, choosing the right siding material and fasteners for the specific climate and conditions is paramount. Using high-quality materials and following the manufacturer’s instructions meticulously will help prevent many common installation problems. Finally, having a clear understanding of the installation process and taking the time to plan each step carefully significantly reduces the likelihood of encountering unforeseen challenges.
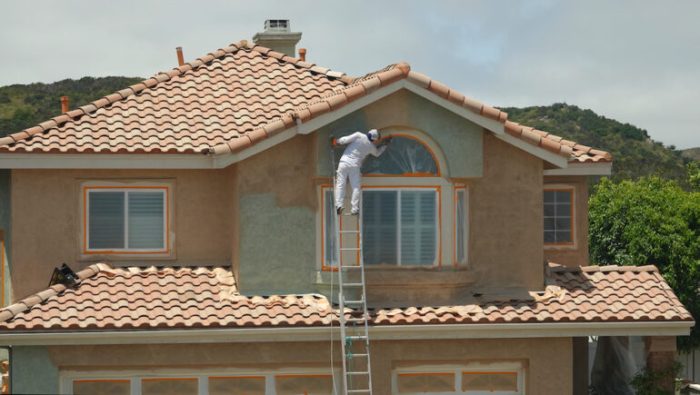
Finishing Touches and Maintenance

Source: guzzostucco.com
Putting the finishing touches on your siding-over-stucco project ensures a professional look and long-lasting protection. This involves careful attention to detail in caulking, trim work, and flashing, followed by a commitment to regular maintenance.
Properly completing these final steps significantly impacts the longevity and aesthetic appeal of your new siding. Neglecting these details can lead to water damage, compromised insulation, and a less-than-perfect finished product.
Caulking, Trim Work, and Flashing
Caulking, trim work, and flashing are crucial for preventing water intrusion. Caulk all seams and gaps between siding panels, around windows and doors, and where the siding meets other building elements. Use a high-quality, exterior-grade caulk that’s compatible with both your siding and stucco. Trim work, such as corner boards, J-channels, and window and door casings, provides a neat and finished appearance, while also protecting vulnerable edges. Flashing, typically a thin, waterproof material, is essential around windows, doors, and other penetrations to divert water away from the building. Properly installed flashing creates a barrier that prevents water from seeping behind the siding and into the wall. Consider using self-adhering flashing tape for easier installation and a more secure seal.
Maintenance Practices for Siding Over Stucco
Regular maintenance is key to extending the lifespan of your siding. This includes annual inspections to check for loose or damaged siding, caulking, and flashing. Addressing small issues promptly prevents them from becoming larger, more costly problems. Cleaning your siding regularly, ideally twice a year, removes dirt, debris, and mildew. Use a soft-bristled brush and a solution of mild detergent and water. Avoid using high-pressure washers, as these can damage the siding and underlying stucco. For stubborn stains or mildew, consider using a siding cleaner specifically designed for your siding material. Always follow the manufacturer’s instructions carefully.
Cleaning and Repairing Minor Damage
Minor damage, such as small dents or scratches, can often be repaired easily. For small dents, you might be able to gently push them back into place. For scratches, a touch-up paint that matches your siding color can effectively camouflage the damage. More significant damage, such as cracks or holes, may require professional repair. If you notice any signs of water damage, such as discoloration or swelling, it’s crucial to address the issue promptly to prevent further damage. Remember to always refer to the manufacturer’s instructions for cleaning and repair recommendations specific to your siding material. Ignoring even minor damage can lead to costly repairs down the line. For example, a small crack left unaddressed could allow water to penetrate, leading to rot in the underlying wood or damage to the stucco.
Visual Examples
Source: avalonhomeinspections.net
Seeing is believing, and when it comes to siding over stucco, visual examples can be incredibly helpful in understanding both successful and unsuccessful projects. These examples will highlight key aspects of material choice, installation techniques, and the overall aesthetic impact.
Successful Siding Over Stucco Project
Imagine a charming craftsman-style home, originally clad in aged stucco showing signs of cracking and discoloration. The homeowner opted for a durable, low-maintenance solution: fiber cement siding in a warm, earthy tone that complements the home’s architectural details. The installation was meticulous. The existing stucco was thoroughly assessed and any loose or damaged areas were repaired. A weather-resistant barrier was installed to prevent moisture penetration. The fiber cement panels were carefully cut and fitted, with attention paid to creating crisp lines and even overlaps. The final result is a stunning transformation. The new siding looks clean, crisp, and uniform. The earthy tones of the fiber cement complement the existing architectural details, creating a cohesive and aesthetically pleasing exterior. The homeowner enjoys a home that looks refreshed, modern, and well-maintained, without the ongoing upkeep associated with the original stucco. The color choice successfully blends with the surrounding landscape, enhancing the overall curb appeal.
Unsuccessful Siding Over Stucco Project
Now, picture a different scenario. A homeowner chose vinyl siding as a budget-friendly option but skipped crucial preparation steps. The old stucco was not properly assessed or repaired before installation. The vinyl siding was installed directly over the cracked and crumbling stucco, with insufficient attention paid to proper flashing and sealing around windows and doors. The result? Within a year, the vinyl siding showed signs of buckling and warping in areas where the underlying stucco was unstable. Moisture seeped behind the siding, leading to mold growth and further damage. The visual outcome is unsightly. The buckling vinyl siding looks uneven and unprofessional. The color choice clashes with the existing home’s architecture, making it look jarring and out of place. The overall appearance is one of neglect and poor workmanship, detracting significantly from the home’s curb appeal. The project demonstrates the critical importance of proper preparation and material selection in siding-over-stucco projects. The cost savings from choosing a less expensive material were far outweighed by the expense and hassle of repairing the resulting damage.
Final Thoughts
Source: houseopedia.com
Successfully installing siding over stucco requires careful planning, proper preparation, and attention to detail. By following the steps Artikel in this guide, you can achieve a beautiful and long-lasting result that enhances your home’s value and curb appeal. Remember to prioritize thorough inspection, material selection appropriate for your climate, and meticulous installation to avoid potential problems. With the right approach, this project can be a rewarding and transformative experience for your home.