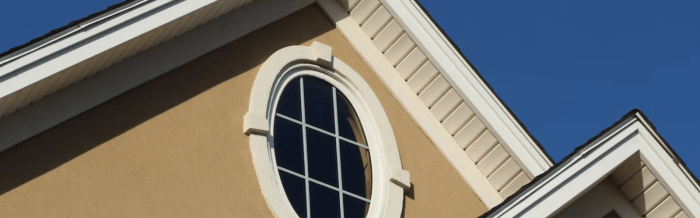
Stucco Over Siding A Complete Guide
Stucco over siding presents a unique opportunity to revitalize your home’s exterior, offering a durable and aesthetically pleasing finish. But is it the right choice for you? This guide dives into the process of applying stucco over existing siding, exploring the advantages, disadvantages, and crucial steps involved. We’ll cover everything from choosing the right type of siding to mastering application techniques and addressing potential problems along the way. Get ready to transform your home’s curb appeal!
We’ll examine different siding types compatible with stucco, detailing preparation methods for each. Learn about the essential tools and materials, from stucco mixes and primers to trowels and protective gear. We’ll also navigate the complexities of building codes and regulations to ensure a smooth and compliant project. By the end, you’ll have a comprehensive understanding of whether stucco over siding is the perfect solution for your home improvement project, and how to successfully execute it.
Introduction to Stucco Over Siding
Source: allurausa.com
Applying stucco over existing siding is a home renovation project that can significantly alter a building’s aesthetic appeal and potentially improve its energy efficiency. It involves preparing the existing siding, applying a base coat, a brown coat, and finally, a finish coat of stucco. This process requires careful planning and execution to ensure a durable and attractive final product. Improper application can lead to problems such as cracking, water damage, and even structural issues.
The decision to apply stucco over siding involves weighing the benefits against the drawbacks. It’s a significant undertaking, both in terms of time and cost, and shouldn’t be undertaken lightly.
Advantages and Disadvantages of Stucco Over-Siding
Stucco offers several advantages when applied over existing siding. It creates a durable, weather-resistant exterior that can last for many decades with proper maintenance. The variety of colors, textures, and finishes available allows for considerable aesthetic customization. Furthermore, stucco can enhance a home’s energy efficiency by providing an extra layer of insulation, leading to potential cost savings on heating and cooling bills. However, it’s a more expensive option than many other exterior cladding materials, and the installation process can be quite disruptive. The weight of the stucco can also place additional stress on the underlying structure, requiring careful assessment before commencement. Moreover, poorly installed stucco can be prone to cracking and moisture problems, leading to costly repairs down the line. It’s crucial to hire experienced professionals for this type of project.
A Brief History of Stucco as an Exterior Cladding Material
Stucco’s history stretches back millennia. Ancient civilizations, including the Greeks and Romans, utilized stucco extensively in their construction projects. Its enduring popularity stems from its versatility, durability, and relative affordability. Throughout history, stucco formulations have evolved, incorporating different binding agents and aggregates to achieve varying properties. The development of Portland cement in the 19th century significantly influenced stucco’s modern formulation, leading to its widespread use in residential and commercial construction. While traditional stucco relied on lime-based mixes, modern stucco often incorporates cement, sand, and water, offering improved strength and water resistance. The techniques for applying stucco have also advanced, with specialized tools and equipment allowing for more precise and efficient application.
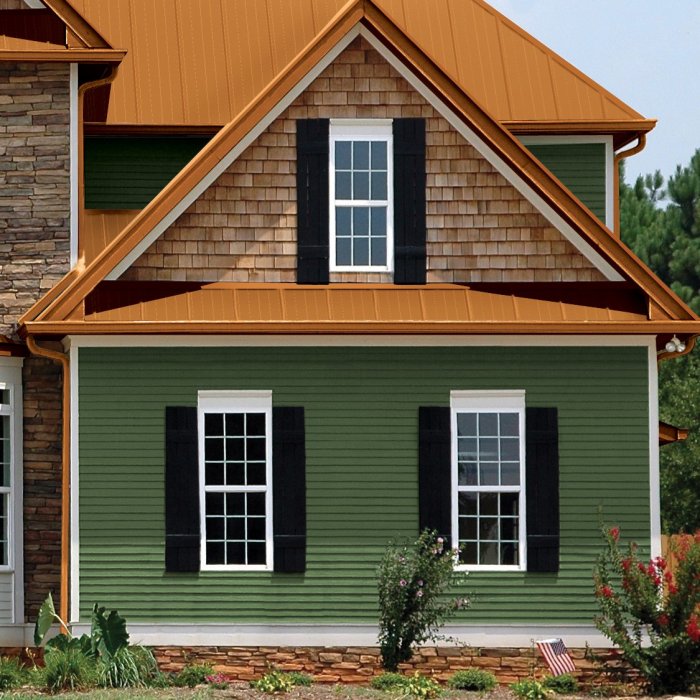
Types of Siding Suitable for Stucco Application

Source: amipdx.com
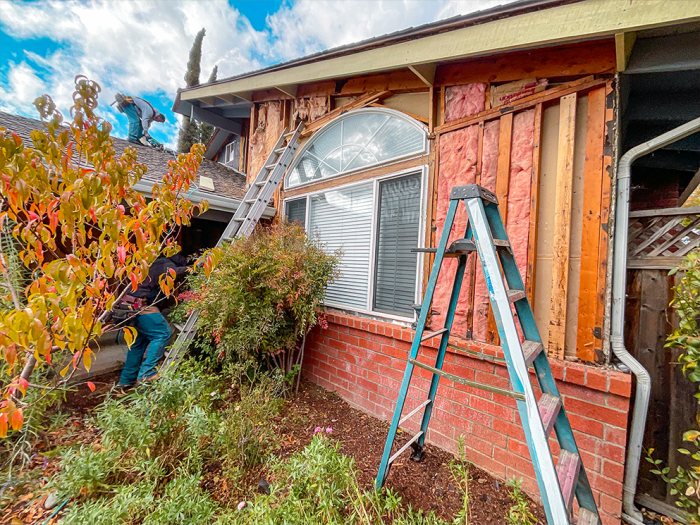
Applying stucco over existing siding can be a great way to update a home’s exterior, but not all siding types are created equal when it comes to stucco compatibility. The success of the project hinges heavily on choosing the right siding and preparing it properly. Certain materials bond better than others, and inadequate preparation can lead to costly problems down the line, such as cracking, peeling, and moisture damage.
Choosing the right siding for a stucco application involves considering factors like material strength, moisture resistance, and surface texture. Wood, vinyl, and fiber cement are common siding materials, each presenting unique advantages and disadvantages for stucco application. Careful consideration of these factors ensures a long-lasting and aesthetically pleasing finish.
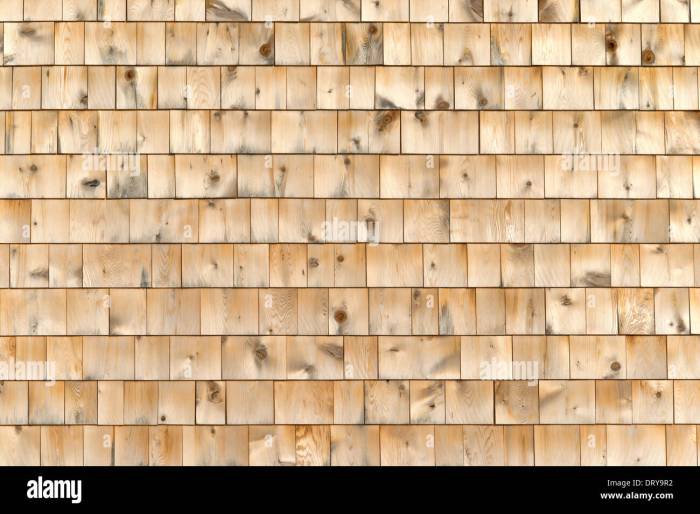
Wood Siding and Stucco
Wood siding, while aesthetically pleasing, presents challenges for stucco application. Its inherent porosity and susceptibility to moisture absorption require thorough preparation. Before applying stucco, wood siding must be thoroughly cleaned, inspected for rot or damage, and treated with a water-repellent sealant. Any damaged areas need to be repaired or replaced. Furthermore, the surface should be primed with a bonding agent to enhance adhesion between the stucco and the wood. This meticulous preparation is crucial to prevent moisture penetration and subsequent damage to the wood and stucco. Failure to adequately prepare wood siding can result in the stucco failing prematurely.
Vinyl Siding and Stucco
Vinyl siding is generally not recommended for direct stucco application. Its smooth, non-porous surface offers poor adhesion for stucco. The different expansion and contraction rates of vinyl and stucco can also lead to cracking and separation. While some contractors might attempt to apply stucco to vinyl siding using specialized bonding agents, the long-term durability of such applications is questionable. The risk of failure significantly outweighs the potential cost savings, making alternative solutions generally preferable. Replacing vinyl siding with a more suitable material is often the most reliable and cost-effective approach in the long run.
Fiber Cement Siding and Stucco
Fiber cement siding offers a superior base for stucco application compared to wood or vinyl. Its durability, moisture resistance, and relatively smooth surface create a stable and compatible substrate. Preparation involves cleaning the siding thoroughly to remove dirt, debris, and any loose or damaged sections. Minor imperfections can be repaired with a suitable patching compound. A bonding agent is typically applied to improve adhesion, though the strong, stable nature of fiber cement often requires less aggressive priming than wood. This makes fiber cement a popular choice for homeowners seeking a durable and attractive stucco finish. Its stability minimizes the risk of cracking and peeling, resulting in a longer-lasting exterior.
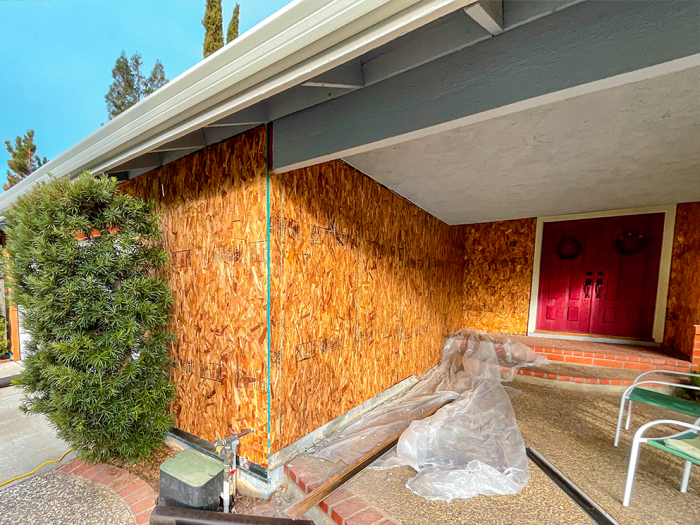
Preparation and Surface Treatment
Source: plasteringsolutionsusa.com
Getting your existing siding ready for a stucco makeover is crucial for a long-lasting, attractive finish. Proper preparation ensures the stucco adheres well and prevents future problems like cracking or peeling. This involves a thorough cleaning, necessary repairs, and the application of primers and sealants to create a strong bond between the siding and the stucco.
Preparing the surface correctly is arguably the most important step in the entire stucco-over-siding process. Neglecting this phase can lead to costly repairs down the line. A well-prepared surface ensures the stucco adheres properly, preventing premature failure.
Cleaning the Existing Siding
Thorough cleaning removes dirt, grime, mildew, loose paint, and other debris that could interfere with the stucco’s adhesion. Pressure washing is often the most effective method, using a low-pressure nozzle to avoid damaging the siding. Always test a small, inconspicuous area first to ensure the pressure doesn’t harm the material. After pressure washing, allow the siding to dry completely before proceeding to repairs. For stubborn stains or mildew, a suitable cleaning solution may be necessary, following the manufacturer’s instructions carefully.
Repairing Damaged Siding
Before applying stucco, any damaged areas of the siding must be repaired. This includes filling cracks, holes, and gaps with appropriate patching compounds. The patching material should be compatible with the existing siding material and should be allowed to cure completely before further treatment. Any loose or damaged siding sections should be removed and replaced. Ensure the repairs are smooth and flush with the surrounding surface for a seamless finish. For larger areas of damage, consider consulting a professional for the best repair methods.
Priming and Sealing
Priming and sealing the siding create a uniform surface and improve the stucco’s adhesion. Primers help to seal the surface, improve the bond between the stucco and the siding, and provide a consistent base for the stucco to adhere to. Sealants further enhance water resistance and protect the underlying siding from moisture damage. The choice of primer and sealant depends on the type of siding material.
Primer Selection for Different Siding Materials
| Siding Material | Suitable Primer | Primer Properties | Considerations |
|---|---|---|---|
| Wood | Oil-based primer, or an acrylic primer specifically formulated for wood | Good penetration, blocks tannins, provides a durable base | Ensure proper drying time before applying stucco |
| Vinyl | Acrylic primer designed for vinyl siding | Good adhesion to smooth surfaces prevents staining | May require a bonding primer for better adhesion |
| Aluminum | Acrylic primer with good adhesion to metal | Provides a good base for stucco, prevents corrosion | Clean the surface thoroughly to remove any oxidation |
| Fiber Cement | Acrylic primer formulated for masonry or fiber cement | Good adhesion resists moisture | Ensure the surface is clean and free of dust |
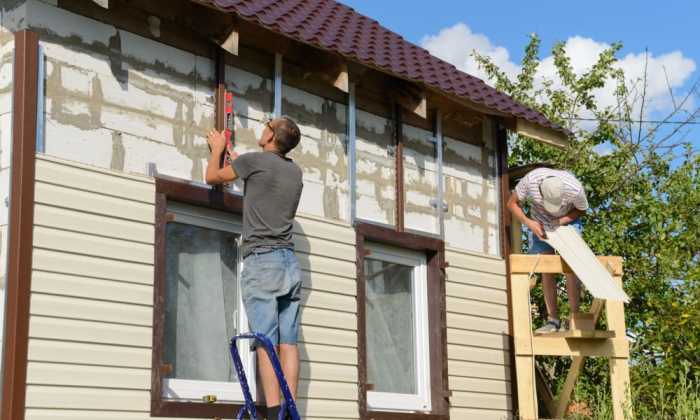
Stucco Application Techniques

Source: hometips.com
Applying stucco over existing siding requires careful consideration of the chosen method to ensure a durable and aesthetically pleasing finish. The most common techniques are direct application and the lath system. Each offers distinct advantages and disadvantages depending on the condition of the siding and the desired outcome.
Direct Stucco Application
Direct application involves applying stucco directly onto the prepared siding surface. This method is generally faster and less expensive than using a lath system, but it’s crucial that the siding is sound and provides a suitable base for adhesion. This method is best suited for smooth, solid siding materials like fiber cement or some types of hardy board. Poorly adhered siding or siding with significant gaps will likely fail.
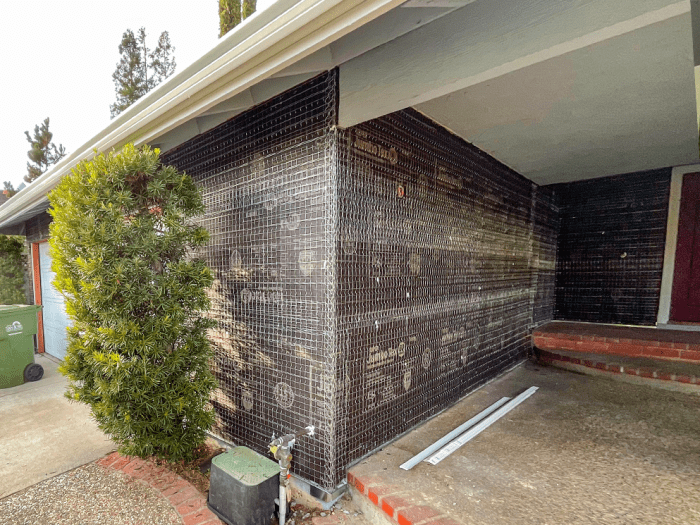
Lath System Stucco Application
The lath system involves installing a layer of metal or wood lath over the existing siding before applying the stucco. This creates a framework that improves adhesion, allows for better drainage, and provides a more robust base for the stucco. While more labor-intensive and costly upfront, this method is far more suitable for older, less stable siding or siding with significant gaps or imperfections. It also offers better protection against moisture damage.
Comparison of Application Methods
| Feature | Direct Application | Lath System |
|---|---|---|
| Cost | Lower initial cost | Higher initial cost |
| Time | Faster application | Slower application |
| Suitability | Suitable for sound, smooth siding | Suitable for all siding types, especially older or damaged siding |
| Durability | Less durable, prone to cracking if the siding is not stable | More durable, better resistance to cracking and moisture damage |
| Moisture Protection | Less effective moisture protection | Better moisture protection |
Step-by-Step Guide: Applying Stucco Over Wood Siding (Lath System)
This guide assumes the wood siding is sound but may have some gaps or imperfections. For severely damaged siding, complete replacement is recommended.
- Surface Preparation: Thoroughly clean the wood siding to remove dirt, loose paint, and debris. Repair any significant damage or gaps using appropriate wood filler and ensure all surfaces are dry.
- Lath Installation: Install galvanized metal lath over the cleaned siding. Overlap the lath sheets by at least 1 inch and secure them to the siding using galvanized nails or staples every 6 inches. Ensure the lath is flush with the siding surface.
- Flashing: Install flashing around windows, doors, and other openings to prevent water penetration. This involves overlapping flashing material and sealing all joints with a waterproof sealant.
- Scratch Coat Application: Apply a scratch coat of stucco, a relatively thin layer (approximately 1/4 inch). This coat serves as a bonding agent and provides a textured surface for the following coats to adhere to. Use a trowel to create a rough, textured surface.
- Brown Coat Application: Once the scratch coat has dried (typically 2-3 days), apply a brown coat of stucco, a thicker layer (approximately 1/2 inch). This coat forms the main body of the stucco. Ensure even thickness to avoid cracking.
- Finish Coat Application: After the brown coat has cured (typically 7-10 days), apply the finish coat of stucco. This coat provides the final texture and appearance. Several different techniques and textures can be achieved with this coat.
- Curing: Keep the stucco moist for several days after application to prevent cracking. This can be achieved by regularly spraying the surface with water.
Illustrative Example of Lath Installation: Imagine a section of wood siding with some gaps. The metal lath is laid over this, covering the entire surface. Nails or staples secure the lath to the wood, creating a continuous mesh. The image would show the overlapping metal lath sheets, secured to the wood siding underneath. The nails would be visible, and the lath would appear somewhat wrinkled to conform to the underlying surface.
Illustrative Example of Scratch Coat Application: Imagine a freshly applied scratch coat. The stucco is uneven, with a rough, textured surface. It’s not smooth; it’s visibly textured with many small peaks and valleys. This rough texture provides a mechanical bond for the brown coat to adhere to.
Materials and Tools Required
Source: plasteringsolutionsusa.com
Successfully applying stucco over siding requires the right tools and materials. Having everything prepared beforehand will streamline the process and ensure a professional finish. This section details the necessary components, categorized for easy understanding.
Stucco Mixes
Choosing the right stucco mix is crucial for a durable and aesthetically pleasing finish. The type of stucco will depend on factors like climate and the desired texture. Generally, you’ll need a base coat, a brown coat (or intermediate coat), and a finish coat. Each coat serves a distinct purpose, contributing to the overall strength and appearance of the stucco.
- Base Coat: This is the foundation layer, providing adhesion to the siding and structural support. It’s typically a cement-based mix, often containing sand and lime for workability. A common mix ratio might be 1 part Portland cement, 2 parts hydrated lime, and 6 parts sand.
- Brown Coat (Intermediate Coat): Applied over the base coat, this layer further builds thickness and provides a level surface for the finish coat. It’s usually a similar mix to the base coat but might have slightly less lime for improved strength.
- Finish Coat: This is the outermost layer, responsible for the final texture and appearance. The mix can vary depending on the desired finish (e.g., smooth, textured, etc.). Acrylic polymers might be added for improved durability and water resistance.
Tools
The right tools make the job easier and improve the quality of the finish. Investing in quality tools is worthwhile for a project of this nature.
- Mixing Equipment: A large-capacity cement mixer (either a stand-alone unit or a drill with a paddle mixer attachment) is essential for thoroughly mixing the stucco. A wheelbarrow is also handy for transporting the mixed stucco.
- Measuring Tools: Accurate measurement is key for consistent stucco mixes. Use a measuring tape for determining areas and a bucket or scale for measuring the components of the stucco mix.
- Application Tools: These include hawk (a flat, handheld platform for holding stucco), trowels (for applying and smoothing the stucco), and a texture tool (for creating the desired surface texture – this could be a variety of tools depending on the finish). A long handled float is ideal for achieving a smooth surface.
- Other Tools: You’ll also need tools for preparing the surface, such as a wire brush, putty knife, and possibly a pressure washer. A scaffolding or ladder will be needed to reach higher areas.
Protective Gear
Safety should always be a priority. Working with stucco involves potentially harmful materials, so appropriate protective gear is essential.
- Safety Glasses/Goggles: Protect your eyes from flying debris and cement dust.
- Dust Mask/Respirator: Cement dust can be irritating and harmful to your lungs, so a respirator is crucial.
- Gloves: Protect your hands from cement burns and irritation.
- Work Boots: Protect your feet.
- Long-sleeved Shirt and Pants: Protect your skin from cement and other irritants.
Addressing Potential Issues and Troubleshooting

Source: hometips.com
Applying stucco over siding presents unique challenges. Understanding potential problems and implementing preventative measures is crucial for a long-lasting, aesthetically pleasing finish. Ignoring these issues can lead to costly repairs down the line, so let’s explore some common problems and their solutions.
Cracking
Cracks in stucco are a common problem, often appearing as hairline fractures or larger, more significant breaks. These cracks can stem from several factors, including poor substrate preparation (uneven siding, insufficient surface treatment), improper stucco mix proportions, insufficient curing time, or movement in the underlying structure (settling foundation, expansion, and contraction of the building). Preventing cracks involves thorough preparation of the siding surface, ensuring a smooth and stable base. Using a flexible stucco mix designed for movement and allowing sufficient curing time are also key preventative steps. Repairing cracks involves carefully cleaning the crack, applying a compatible patching compound, and then feathering the edges for a seamless finish. In cases of significant cracking, a professional assessment may be necessary to determine the underlying cause and recommend appropriate remediation.
Water Damage
Water damage is a serious concern with stucco, potentially leading to mold growth, structural damage, and deterioration of the stucco itself. Poorly sealed joints, cracks in the stucco, or inadequate flashing around windows and doors can all allow water penetration. Preventative measures include ensuring proper flashing installation, using a high-quality, water-resistant stucco mix, and applying a sealant to prevent water ingress. Addressing water damage often requires identifying and repairing the source of the leak, allowing the affected area to dry completely, and then repairing or replacing the damaged stucco. In severe cases, professional intervention may be needed to address moisture intrusion and potential structural issues.
Poor Adhesion
Poor adhesion, where the stucco fails to bond properly to the underlying siding, is another significant problem. This can result from a dirty or oily siding surface, improper surface preparation (lack of priming or insufficient bonding agent), or using an incompatible stucco mix. Prevention focuses on meticulously cleaning the siding surface, applying a suitable bonding agent, and ensuring the siding is properly prepared (e.g., filling gaps and cracks). Remedying poor adhesion typically involves removing the poorly adhered stucco, properly preparing the surface again, and then reapplying the stucco using the correct techniques and materials. In some cases, it may be necessary to consider alternative solutions, such as removing the existing siding and applying stucco directly to the sheathing.
Finishing and Maintenance
Source: plasteringsolutionsusa.com
Getting a smooth, durable, and attractive stucco finish requires careful attention to detail during the final stages of application. Proper maintenance afterward will significantly extend the life of your stucco exterior.
The finishing process begins with ensuring the stucco is properly cured. This usually involves allowing sufficient drying time, depending on weather conditions and the type of stucco used. Once cured, any imperfections or inconsistencies in the surface texture can be addressed. This might involve filling minor cracks or holes with a suitable patching compound, sanding down any rough patches, and carefully applying additional stucco where needed to create a uniform surface. The final step is often applying a sealant or water repellent to protect the stucco from moisture damage and enhance its longevity. This sealant helps to prevent water penetration, which is a major cause of stucco deterioration.
Post-Application Finishing Techniques
Several techniques contribute to a professional finish. Careful tooling, such as using a specialized trowel to create a smooth or textured surface, is crucial. Color matching is also important, particularly if using multiple batches of stucco. Any minor imperfections should be addressed before the stucco fully dries to prevent later issues. Using a high-quality sealant is essential; it should be applied evenly and according to the manufacturer’s instructions.
Stucco Maintenance Strategies, Stucco siding
Regular maintenance is key to preserving the beauty and integrity of your stucco exterior. This includes preventative measures that can minimize the need for costly repairs later. A proactive approach will save you both time and money in the long run.
- Annual Inspections: A thorough visual inspection at least once a year will help identify any cracks, loose areas, or signs of moisture damage early on, allowing for timely repairs before problems worsen.
- Cleaning: Regular cleaning using a soft brush and water removes dirt, mildew, and other debris that can accumulate over time. For stubborn stains, a gentle cleaning solution specifically designed for stucco can be used, following the product instructions carefully.
- Caulk Repairs: Check and replace any damaged caulk around windows, doors, and other openings. Caulk acts as a barrier against moisture intrusion, and maintaining its integrity is crucial for stucco protection.
- Moisture Management: Proper drainage around the foundation is vital to prevent water from accumulating against the stucco. Ensure downspouts and gutters are functioning correctly and direct water away from the building.
- Repairing Cracks: Small cracks should be repaired promptly using a suitable patching compound. Larger cracks may require professional attention to ensure proper repair and prevent further damage.
Importance of Regular Inspections and Repairs
Regular inspections are not just about aesthetics; they’re about protecting your home’s structural integrity. Early detection of problems, such as water damage or structural cracks, allows for timely intervention, preventing costly and extensive repairs down the line. Ignoring minor issues can lead to significant damage, including water intrusion causing mold growth, structural weakening, and even compromising the building’s foundation. A proactive maintenance approach significantly extends the lifespan of your stucco and maintains the value of your property.
Cost Considerations

Source: stuccocontractorsantafe.com
Applying stucco over siding is a significant investment, and understanding the cost factors is crucial for successful project planning. Several variables influence the final price, from the initial preparation work to the finishing touches. Accurate budgeting requires careful consideration of these factors to avoid unexpected expenses.
Factors influencing the cost of applying stucco over siding are numerous and interconnected. Labor costs represent a significant portion, often accounting for 50% or more of the total expense. The complexity of the project, such as the size of the surface area, the condition of the existing siding, and the need for extensive repairs, directly impacts labor hours and, consequently, the overall cost. Material costs vary depending on the type of stucco chosen, the need for additional underlayment or mesh, and the quality of the chosen materials. Higher-quality materials generally last longer and require less maintenance, potentially offsetting their higher initial cost in the long run. Permits and inspections add another layer of expense, with costs varying significantly by location and the complexity of the project. Finally, unforeseen issues, such as rotted siding requiring extensive repair or unexpected structural problems, can significantly inflate the budget.
Labor Costs
Labor costs are a primary driver of overall project expenses. A skilled stucco contractor commands a higher hourly rate, reflecting their expertise and experience. The time required for preparation work, such as removing loose siding, repairing damaged areas, and applying waterproofing membranes, significantly impacts the overall labor cost. Larger projects naturally require more labor hours, leading to higher overall costs. For example, a small 100 sq ft project might cost $2000-$3000 in labor, whereas a 1000 sq ft project could easily cost $15,000-$25,000 or more, depending on location and contractor.
Material Costs
The type of stucco chosen directly affects material costs. Acrylic stucco, for example, is generally more expensive than cement-based stucco but offers superior durability and weather resistance. The amount of stucco required depends on the surface area and the thickness of the applied coats. Additional materials like wire mesh, underlayment, and primers add to the total cost. For instance, high-quality acrylic stucco might cost $3-$5 per square foot, while cement stucco might range from $1-$3 per square foot. These prices can vary based on location and supplier.
Comparison to Other Cladding Options
Stucco offers a durable and aesthetically pleasing exterior finish, but it’s essential to compare its cost to alternative cladding options. Vinyl siding is generally less expensive than stucco, offering a quicker and simpler installation process. However, vinyl siding typically has a shorter lifespan and is less durable than stucco. Brick, on the other hand, is usually more expensive than stucco but offers exceptional longevity and durability. Wood siding offers a natural aesthetic appeal but requires more maintenance and is generally more expensive than stucco, especially considering long-term maintenance costs. A detailed cost comparison for a specific project should consider material costs, labor costs, and the lifespan of each option to determine the most cost-effective choice in the long run.
Budgeting and Cost Management Tips
Effective budgeting is crucial for managing the costs of stucco application. Obtaining multiple quotes from reputable contractors allows for comparison and helps identify fair pricing. Thorough preparation, including addressing all necessary repairs to the existing siding before stucco application, prevents unexpected cost overruns. Clearly defining the scope of the project with the contractor minimizes ambiguity and prevents disputes over additional charges. Choosing cost-effective materials without compromising quality can help balance cost and performance. Finally, securing financing options, if needed, ensures that the project remains financially manageable. Careful planning and communication with the contractor are key to staying within budget.
Building Codes and Regulations

Source: website-files.com
Applying stucco over existing siding isn’t just about aesthetics; it’s about ensuring the structural integrity and safety of your home. This involves navigating a landscape of building codes and regulations that vary by location. Understanding these requirements is crucial for a successful and legally compliant project.
Building codes are designed to protect public health and safety. They establish minimum standards for construction, including the application of exterior finishes like stucco. These regulations cover aspects such as fire resistance, moisture control, structural stability, and energy efficiency. Failure to comply can result in fines, delays, or even the need for costly remediation work.
Permitting and Inspections
Obtaining the necessary permits before starting any work is non-negotiable. Permits demonstrate that your project meets local building codes and allows for inspections at key stages of construction. Typical inspections might include checks for proper preparation of the substrate, correct application of stucco, and adherence to fire-rated requirements. These inspections provide a safety net, catching potential problems early and ensuring your stucco job is done to code. Without permits, you risk facing legal action and potentially having your work deemed unsafe and needing to be redone. The process for obtaining permits usually involves submitting detailed plans and specifications to your local building department.
Ensuring Code Compliance
Compliance involves careful planning and execution. Before starting, thoroughly review your local building codes and any relevant amendments. Consult with a qualified building inspector or contractor experienced in stucco application to ensure your plans align with these regulations. This proactive approach helps avoid costly mistakes and ensures a smooth process. For example, understanding the requirements for water-resistant barriers and drainage is critical in preventing moisture damage, a common issue in stucco applications. Similarly, knowing the fire-resistance ratings required for your area will guide your material selections. Careful documentation throughout the project, including photos of each stage, is also important in demonstrating compliance with inspectors. This proactive approach can save you time, money, and potential headaches in the long run.
Closing Notes: Stucco Over Siding

Source: onestopplastering.com
Transforming your home’s exterior with stucco oversiding can be a rewarding experience, enhancing both its beauty and value. By carefully considering the preparation, application techniques, and potential challenges, you can achieve a stunning and long-lasting result. Remember to prioritize proper planning, material selection, and adherence to building codes for a successful project. With careful attention to detail, your home’s new stucco exterior will stand as a testament to your hard work and vision for years to come. Now go forth and stucco!