Wood Siding Over Stucco A Practical Guide
Wood siding over stucco presents a unique challenge and opportunity for homeowners looking to refresh their exterior. This project blends the classic appeal of wood with the durability (or sometimes, the need to replace) of existing stucco. Successfully tackling this requires careful planning, proper preparation, and the right techniques. We’ll explore the feasibility, the steps involved, material choices, and potential pitfalls to help you decide if this is the right approach for your home.
From assessing the suitability of your stucco for this upgrade to mastering the installation process, this guide provides a step-by-step approach. We’ll cover everything from preparing the stucco surface and choosing the right type of wood siding to dealing with common issues like moisture control and expansion/contraction. Whether you’re a seasoned DIYer or a homeowner tackling your first home improvement project, this comprehensive guide will equip you with the knowledge and confidence to succeed.
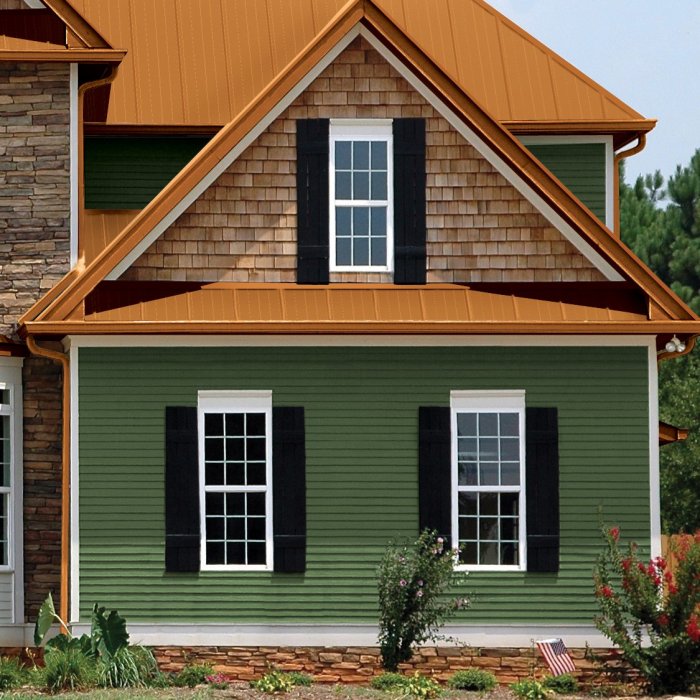
Suitability of Wood Siding Over Stucco
Source: com.ph
Adding wood siding over existing stucco is a project that can dramatically change a home’s aesthetic, but it’s crucial to understand the implications before diving in. The success of this endeavor hinges on several factors, from the condition of the underlying stucco to the climate and your budget.
This section will explore the factors influencing the feasibility of installing wood siding over stucco, highlighting potential challenges and comparing the long-term implications of this approach with keeping the original stucco. We’ll also provide a checklist of essential pre-installation inspections to ensure a successful project.
Factors Affecting Feasibility
Several key factors determine whether adding wood siding over stucco is a viable option. The most important is the condition of the existing stucco. Cracks, loose sections, or significant water damage necessitate repairs before siding installation. Ignoring these issues can lead to rot, mold, and structural problems down the line. The climate also plays a significant role; high humidity and rainfall can accelerate the deterioration of wood siding, especially if proper ventilation isn’t ensured. Finally, the existing wall structure itself needs to be assessed to ensure it can support the added weight of the new siding. A thorough inspection by a qualified professional is highly recommended.
Potential Challenges and Limitations
Installing wood siding over stucco presents several potential challenges. One major concern is moisture. Stucco can trap moisture, and if not properly addressed, this moisture can lead to wood rot and damage to the underlying structure. Proper vapor barriers and drainage are essential to mitigate this risk. Another challenge is the added weight of the new siding. This weight needs to be considered for the existing wall structure’s load-bearing capacity. Finally, the increased thickness of the wall can affect the appearance of windows and doors, requiring adjustments or additional trim work. The added cost of these adjustments should be factored into the budget.
Longevity and Maintenance
Wood siding, while aesthetically pleasing, generally requires more maintenance than stucco. Wood is susceptible to rot, insect infestation, and weathering. Regular painting or staining is usually needed every few years to protect it from the elements. Stucco, on the other hand, is more durable and requires less frequent maintenance, although repairs for cracks or damage are still necessary. The longevity of both materials depends heavily on proper installation and ongoing maintenance. A well-maintained wood siding system can last for decades, but neglect can significantly shorten its lifespan. Similarly, stucco can last for many years if properly installed and repaired as needed.
Pre-Installation Inspection Checklist
Before beginning the installation of wood siding over stucco, a thorough inspection is crucial. This checklist will help ensure a smooth and successful project.
- Assess the condition of the existing stucco for cracks, loose areas, or water damage.
- Inspect the underlying wall structure for any signs of rot, insect infestation, or structural weaknesses.
- Check for proper drainage around the foundation to prevent water from accumulating against the stucco.
- Evaluate the existing wall’s ability to support the added weight of the new siding.
- Determine the need for vapor barriers and insulation to prevent moisture buildup.
- Verify that all necessary permits and approvals have been obtained.
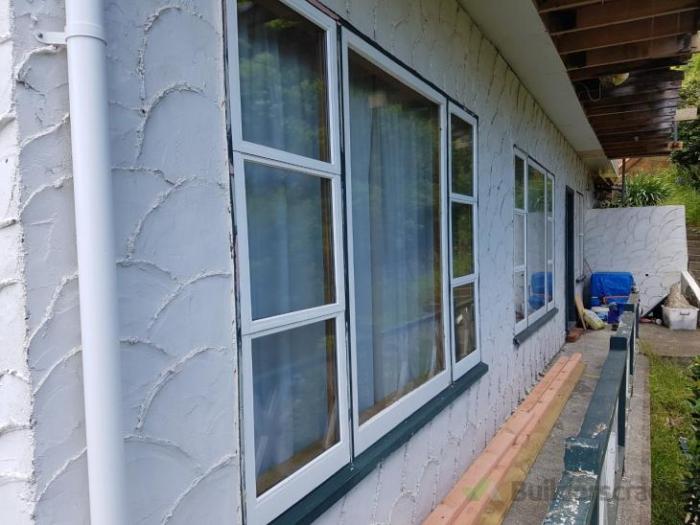
Preparation and Surface Treatment: Wood Siding Over Stucco
Source: kxcdn.com
Getting your stucco ready for wood siding is crucial for a long-lasting, beautiful finish. Proper preparation ensures the siding adheres well and prevents future problems like water damage or peeling. This involves several key steps, from assessing the stucco’s condition to applying a suitable primer.
Stucco Surface Preparation
Before you even think about nailing on the siding, you need to thoroughly inspect the stucco. Look for any loose or crumbling areas, cracks, holes, or significant variations in the surface. These imperfections need to be addressed before proceeding. Loose stucco should be carefully removed and replaced with a patching compound that matches the existing stucco in color and texture. Small cracks can be filled with caulk designed for exterior use, while larger cracks may require more extensive repair, potentially involving wire mesh reinforcement. Once repairs are complete, allow ample drying time before moving to the next stage. Remember, a smooth, solid base is key to a successful siding installation.
Moisture Barrier Application
A proper moisture barrier is non-negotiable. Stucco can absorb moisture, and if that moisture gets trapped behind your new siding, you’re asking for trouble – mold, rot, and premature siding failure. A high-quality waterproof membrane, like a breathable house, should be applied over the stucco surface before the siding goes on. This membrane allows moisture vapor to escape from the inside while preventing water from penetrating from the outside. Overlap the membrane seams properly and seal them with waterproof tape. Ensure the membrane is securely fastened to the stucco surface, using appropriate fasteners designed for the material.
Addressing Stucco Imperfections and Ensuring a Level Surface
Addressing imperfections goes beyond simple crack filling. Significant variations in the stucco’s surface need to be leveled. This might involve using a skim coat of stucco patching compound to fill in deeper depressions or to create a more uniform surface. Use a long straightedge or level to check for any remaining high or low spots after patching and skim coating. Remember, the goal is a smooth, even plane for your wood siding to adhere to. Sanding may be necessary after the patching compound dries to achieve a truly smooth surface.
Priming the Stucco Before Siding Installation
Priming the stucco surface is the final preparation step before siding installation. Primer provides a bonding surface for the siding and helps to seal the stucco, preventing moisture absorption and improving the overall adhesion of the siding. It also ensures a consistent color base for the wood siding, resulting in a more professional-looking finished product.
| Primer Type | Suitability |
| Acrylic Primer | Excellent adhesion to stucco, good moisture resistance, versatile for various siding types. |
| Oil-Based Primer | Provides a strong barrier against moisture, suitable for areas with high humidity, but requires longer drying time. |
| Alkyd Primer | Good adhesion and moisture resistance, often used as a stain-blocking primer for stained wood siding. |
Allow the primer to dry completely according to the manufacturer’s instructions before proceeding with the siding installation. This ensures proper adhesion and prevents problems down the line. Failure to properly prime can lead to peeling siding or other issues.
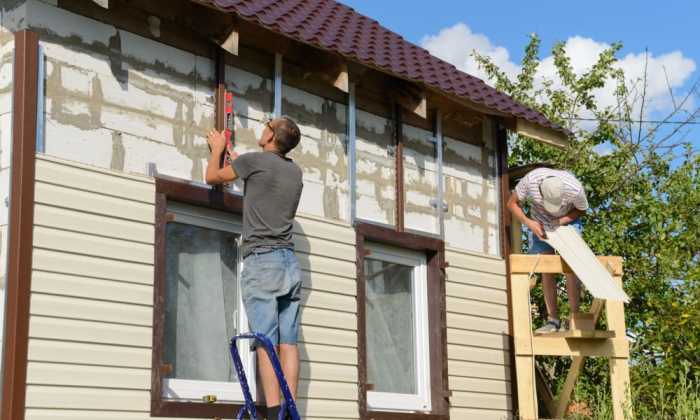
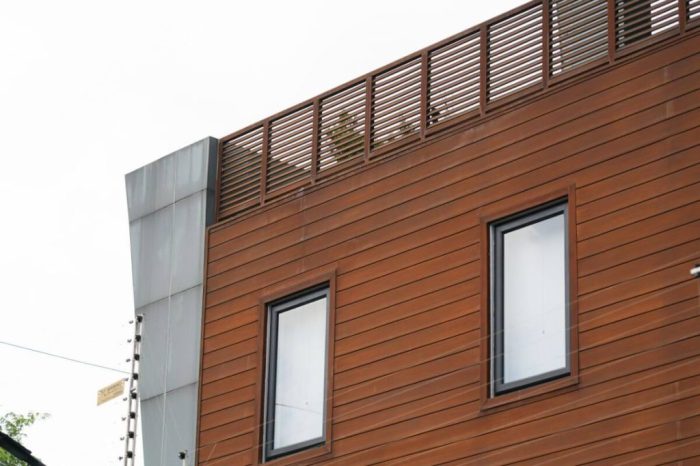
Installation Methods and Techniques

Source: r2.dev
Attaching wood siding to stucco requires careful consideration of the substrate’s unique properties. Direct application isn’t recommended due to stucco’s varied texture and potential for movement. Instead, methods involving a layer of separation are preferred to ensure longevity and prevent damage to the siding.
Different methods exist for attaching wood siding to stucco, each with its advantages and disadvantages. The most common methods involve the use of furring strips or a solid sheathing layer. Proper selection depends on factors like the condition of the stucco, the desired level of insulation, and the type of wood siding being installed.
Furring Strip Installation
Furring strips, typically 1×2 or 1×3 lumber, create a space between the stucco and the siding. This air gap improves insulation by reducing heat transfer and provides crucial ventilation to prevent moisture buildup behind the siding. The strips are attached directly to the stucco using appropriate fasteners, ensuring they are level and plumb. The spacing of the furring strips depends on the width of the siding boards and should be consistent for a professional finish. Using construction adhesive in addition to fasteners enhances the bond and prevents movement. Properly installed furring strips create a level and stable surface for the siding, improving the overall installation and aesthetic appeal.
Solid Sheathing Installation
An alternative to furring strips is installing a solid sheathing layer, such as plywood or OSB, over the stucco. This method provides a more robust base for the siding and allows for a more uniform surface. However, it adds to the overall cost and thickness of the wall assembly. The sheathing is attached to the stucco using construction adhesive and appropriate fasteners, paying close attention to creating a secure and even surface. This method is particularly beneficial when significant insulation is required or when dealing with uneven stucco surfaces. This provides a more substantial substrate and simplifies siding installation.
Siding Around Windows and Doors
Cutting and fitting wood siding around windows and doors requires precision and careful measurement. It’s crucial to pre-cut the siding pieces to accurately fit the openings. Consider using a coping saw or jigsaw for precise cuts, especially around curved or intricate window frames. Use a sharp utility knife to score the back of the siding before making cuts to prevent splintering. Proper flashing should be installed around the windows and doors to prevent water penetration. Caulk any gaps between the siding and the window or door frame to create a weathertight seal. Accurate measurements and precise cuts are essential for a clean and professional finish.
Fastening Techniques for Various Siding Profiles, Wood siding over stucco
Imagine a visual representation showing different siding profiles. For lap siding, fasteners are driven through the top edge of each board, slightly below the overlapping edge of the next board, concealing the fasteners. For board and batten siding, fasteners are driven into the vertical battens, strategically placed to avoid visible fastener heads. For shiplap siding, fasteners are hidden beneath the overlapping edges, similar to lap siding. In each case, use corrosion-resistant fasteners appropriate for the type of wood and the climate. The fasteners should be driven straight to avoid splitting the wood and should be spaced according to manufacturer recommendations. Proper fastener placement and selection contribute significantly to the longevity and aesthetic appeal of the installation.
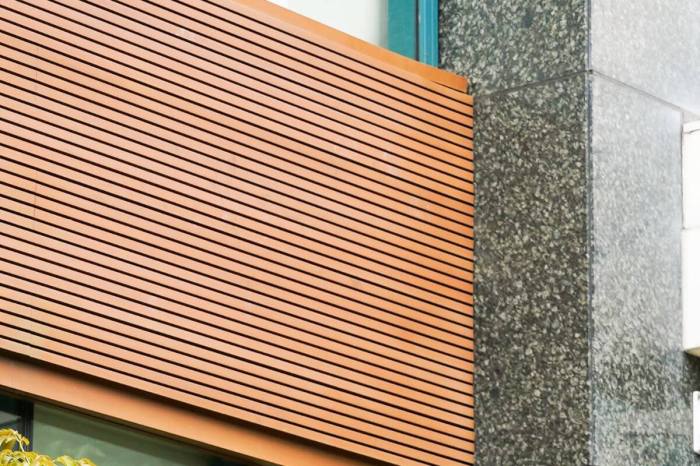
Material Selection and Considerations
Source: co.nz
Choosing the right wood siding for your stucco-clad home is crucial for both aesthetics and longevity. The type of wood you select will significantly impact the project’s overall cost, the required maintenance, and the lifespan of your new siding. Careful consideration of these factors will ensure a beautiful and durable result.
Wood Species Comparison
Several wood species are suitable for siding over stucco, each possessing unique properties. Cedar, redwood, and fir are popular choices due to their natural resistance to rot and insects. However, their durability and cost vary considerably. Cedar, for example, is known for its beautiful grain and natural resistance, but it’s generally more expensive than fir. Redwood also offers excellent durability and resistance to the elements but can be costly. Fir, a more affordable option, still provides good performance, though it may require more frequent maintenance. The table below summarizes these key differences:
| Wood Species | Durability | Maintenance | Cost |
|---|---|---|---|
| Cedar | High – Naturally resistant to rot and insects | Moderate – Periodic cleaning and occasional staining/sealing | High |
| Redwood | High – Naturally resistant to rot and insects | Moderate – Periodic cleaning and occasional staining/sealing | High to Moderate |
| Fir | Moderate – Requires treatment for rot and insect resistance | Higher – More frequent staining/sealing and potential treatment | Low to Moderate |
Fastener Selection and Longevity
The choice of fasteners is critical for the long-term performance of your wood siding. Using galvanized or stainless steel nails or screws is essential to prevent rust and corrosion, which can damage the wood and compromise the siding’s structural integrity. The size and type of fastener should also be appropriate for the thickness of the siding and the underlying stucco. Using undersized fasteners can lead to loose siding, while oversized fasteners can split the wood. For example, using exterior-grade stainless steel screws, specifically designed for wood siding, provides superior holding power and resistance to corrosion compared to standard nails.
Wood Siding Treatment Options
Proper treatment of the wood siding is essential to protect it from the elements and extend its lifespan. Several options are available, each with its advantages and disadvantages.
Choosing the right treatment depends on your desired aesthetic and level of maintenance. A clear sealer will enhance the natural beauty of the wood while offering protection against moisture. Stain provides color and protection, while paint offers the most protection but can mask the natural wood grain.
- Option 1: Clear Sealer: Enhances the natural wood grain and protects against UV rays and moisture. Requires more frequent reapplication than stain or paint.
- Option 2: Stain: Adds color and protection against the elements. Offers a balance between protection and showcasing the wood’s natural beauty. Requires periodic reapplication.
- Option 3: Paint: Provides the most protection against the elements and allows for a wide range of colors. Hides the natural wood grain and may require more frequent repainting than stain or sealer.
Addressing Potential Issues

Source: urestonepanels.com
Installing wood siding over stucco presents unique challenges. Proper planning and execution are crucial to avoid common problems and ensure a long-lasting, attractive exterior. Understanding potential issues and implementing preventative measures will save you time, money, and frustration in the long run.
Moisture Intrusion and Mold Prevention
Preventing moisture intrusion is paramount to avoid mold growth and structural damage. A properly installed moisture barrier is key. This typically involves using a breathable house wrap, installed over the stucco before the wood siding goes on. This allows moisture vapor to escape from the wall cavity while preventing liquid water from penetrating. Proper flashing around windows, doors, and other penetrations is also essential to divert water away from the wall. Regular inspection for leaks and prompt repairs are crucial for maintaining a drywall assembly. Consider using exterior-grade sealants and caulking to prevent water from entering cracks or gaps. Adequate ventilation in the wall cavity also helps to dry out any moisture that might penetrate the barrier.
Managing Wood Siding Expansion and Contraction
Wood expands and contracts with temperature fluctuations. To account for this movement, leave appropriate expansion gaps between siding boards and around fasteners. These gaps allow for movement without causing buckling or cracking. The size of these gaps will depend on the type of wood and the climate, but generally, a gap of 1/8 to 1/4 inch is recommended. Using corrosion-resistant fasteners that allow for some movement is also important. Avoid over-tightening fasteners, as this can restrict movement and lead to damage. Choosing wood siding species known for their dimensional stability, such as cedar or redwood, can also minimize expansion and contraction issues.
Repairing Damaged Wood Siding and Maintaining Appearance
Regular inspection and prompt repair of damaged wood siding are essential for maintaining its appearance and preventing further deterioration. Minor damage, such as scratches or small dents, can often be repaired with wood filler and paint. More significant damage, such as rot or insect infestation, may require replacing the damaged boards. When replacing boards, ensure that the new boards are properly primed and painted to match the existing siding. Regular cleaning of the siding with a pressure washer (using a low-pressure setting to avoid damage) can help remove dirt, mildew, and other debris. Periodic repainting or restaining will also help protect the wood and maintain its appearance.
Common Problems and Solutions
Understanding common problems and their solutions is vital for a successful project. Here’s a table summarizing some typical issues and their solutions:
| Problem | Solution |
|---|---|
| Improper flashing around windows and doors leads to water penetration | Install proper flashing materials and ensure a watertight seal around all openings. Use high-quality sealants and caulking. |
| Insufficient expansion gaps causing buckling or cracking of siding | Ensure adequate expansion gaps are left between siding boards and around fasteners, allowing for wood movement due to temperature changes. |
| The stucco surface is not properly prepared, leading to poor adhesion | Ensure the stucco surface is clean, dry, and free of loose or damaged material before installing the wood siding. Consider using a bonding agent to improve adhesion. |
| Use of unsuitable fasteners causing damage or premature failure | Use corrosion-resistant fasteners appropriate for the type of wood siding and the climate. Avoid over-tightening fasteners. |
| Moisture trapped behind siding due to lack of ventilation | Ensure adequate ventilation in the wall cavity to allow moisture to escape. Consider using vented siding or adding vents to the wall system. |
Final Summary

Source: best-stucco.com
Transforming your home’s exterior with wood siding over stucco can significantly enhance its curb appeal and value. However, it’s a project that demands meticulous attention to detail and careful execution. By understanding the factors influencing feasibility, mastering the preparation and installation techniques, and anticipating potential issues, you can confidently undertake this project and enjoy a beautiful, long-lasting result. Remember to prioritize proper moisture management and material selection to ensure the longevity of your new siding. The reward of a stunning, renewed exterior is well worth the effort!